All posts by M.H Nizami

M.H Nizami, the boy with a wrench in one hand and a keyboard in the other. A self-proclaimed car enthusiast, he's been tinkering with engines since he replaced his dad's Honda Civic brake light fuse at the tender age of 13. When he's not elbow-deep in grease, Hassan is putting his skills to the test as an SEO expert and content writer for some of the biggest brands in the world. Whether he's under the hood or in front of a computer screen, Nizami is always in the driver's seat.

Error Code 853 on Crown Pallet Jack: How To Fix This Fault Code?

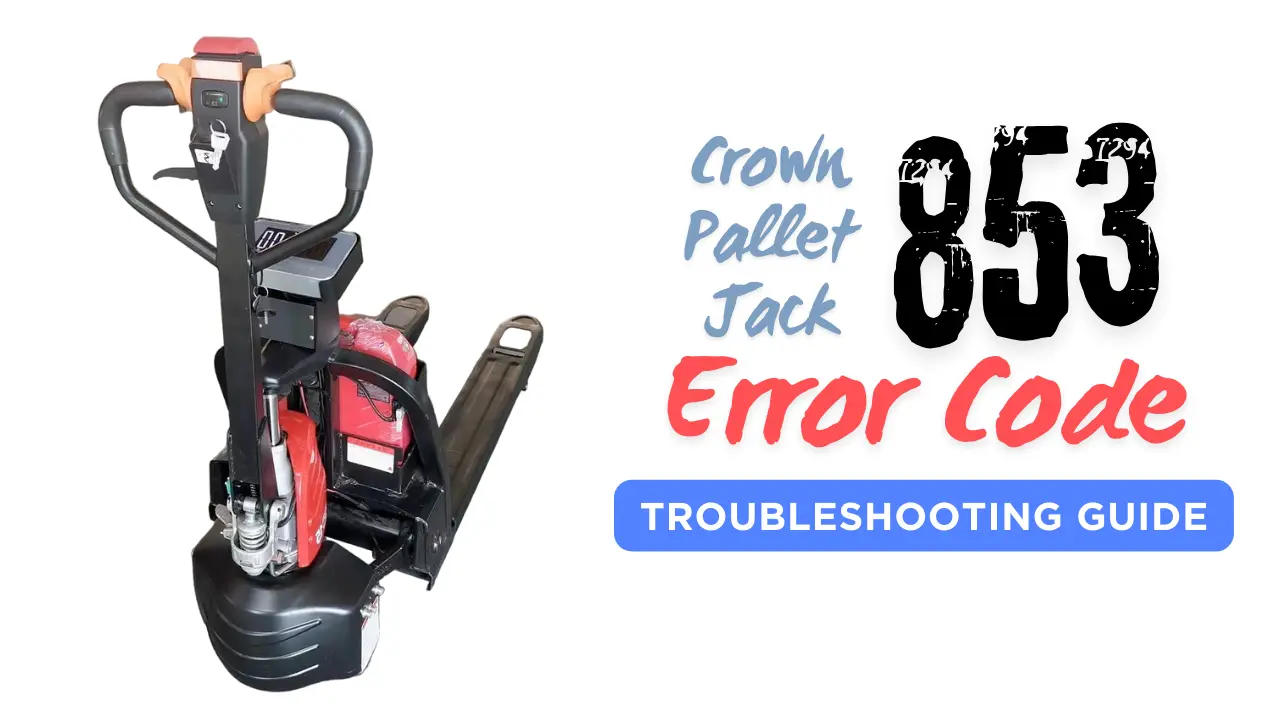
Nothing slows down warehouse operations like an unexpected error code 853 on your go-to Crown pallet jack.

If you’ve ever seen the 853 code on the Crown Pallet Jack while shuttling pallets to and fro, take a deep breath.

Our forklift expert M.H Nizami has the inside scoop on what this code means and how to fix it.

What does the Error Code 853 mean on a Crown Pallet Jack?

Error code 853 on a Crown pallet jack indicates a throttle mismatch. This means the control system isn’t receiving consistent signals between the throttle position and the actual motor movement.

For example, you may try to accelerate forward but the jack sputters or even moves in reverse. Or the throttle seems “sticky” and is slow to respond as you speed up and slow down. Basically, the jack is confused about what you’re telling it to do with the throttle.

A Crown Pallet Jack displaying the 853 Error Code.

When error 853 pops up on the Crown Pallet Jack, you’ll likely experience jerky, inconsistent, or unexpected movement in the forward and reverse directions. The jack may hesitate before responding to throttle input, or it may take off faster than expected. This unpredictable behavior makes the pallet jack difficult to control and can potentially cause accidents.

The good news?

Some basic troubleshooting and maintenance can often fix error 853 on a Crown pallet jack.

Typical solutions include inspecting and cleaning the throttle potentiometer and associated wiring, checking for loose connections, replacing damaged wires, or replacing the potentiometer if faulty.

Our expert will walk you through these steps to get your Crown jack back up and running smoothly. Keep reading for the full troubleshooting details!

Troubleshooting Error Code 853 on Crown Pallet Jack

There are various troubleshooting methods, depending on the underlying issue causing the error 853 on Crown pallet jacks. Some fixes like repairing short circuits in cable connections are quick, while replacing faulty potentiometers requires more technical work. The complexity of repairs for code 853 ranges from fast fixes to more intensive part swaps, so diagnosing the specific problem is key before beginning any troubleshooting.

➜ Replace Potentiometer or Throttle Card

  1. Remove the switch cap and disconnect the connectors.
  2. Replace the potentiometer or throttle card inside the grip.
  3. Reconnect and reassemble the switch cap.

➜ Replace Control Circuit Fuse (FU3)

  1. Check the FU3 fuse for damage.
  2. Test continuity with a multimeter.
  3. Replace with a new fuse if blown, addressing any underlying issues.

➜ Check Wiring for Opens or Shorts

  1. Inspect wiring from positive signal to CA205-3 and from B-NEG to CA205-2.
  2. Use a multimeter to test for continuity and shorts.
  3. Repair or replace damaged wires.

➜ Confirm Values in Tiller Throttle Menu

  1. Use the handset controller to access the Monitor menu.
  2. Navigate to the Tiller Throttle menu and check the Raw Tiller Throttle value.
  3. Replace the faulty throttle potentiometer if the value on Neutral is not 0.

➜ Check Harnesses and Connections

  1. Inspect wiring harnesses for damage, particularly at knuckle/pivot points.
  2. Apply DeoxIT Gold to connectors and recalibrate.
  3. Replace potentiometers if necessary, especially if stops are worn.

How To Fix Error Code 853 on Crown Pallet Jacks?

Error code 853 on the Crown pallet jack can be frustrating to deal with. Here we have shared the 5 tried-and-tested fixes to try for this fault code.

Fix #1: Replace The Potentiometer or Throttle Card

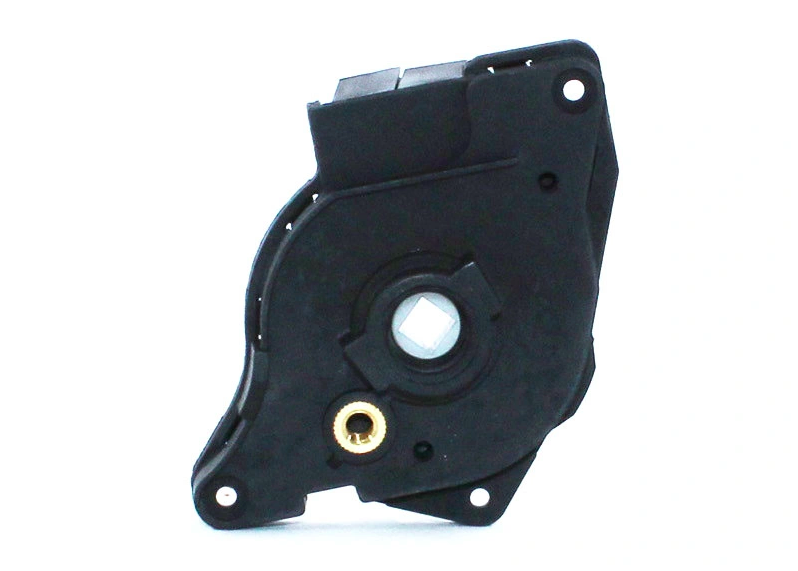
Error Code 853 on Crown pallet jacks typically results from malfunctioning components within the electronic handle. Specifically, the potentiometer and throttle control card are most likely to blame.

The potentiometer is a sensor that detects the angle of the twist grip and converts it into an electrical signal. This tells the motor how fast to drive the wheels. The throttle control card takes the potentiometer’s signal and regulates the motor speed.

If either component fails, you’ll get error 853 and probably issues with going forward or backward. The potentiometer might not sense the twist grip properly, so the throttle card doesn’t know how fast you want to go. Or the throttle card could be malfunctioning and unable to control the motor, even with a good signal.

These electronic parts are critical for smooth, variable speed control on modern Crown pallet jacks. Older jacks had simple switches, but the twist grip allows precise speed regulation. Losing this makes the jack frustrating to operate.

To fix Error Code 853 on a Crown Pallet Jack, you’ll need to remove the handle’s switch cap and unplug the connectors. Then open up the grip to access the potentiometer and throttle card. Once located, replace either or both components with new parts to resolve the error and restore full functionality to the pallet jack.

Potentiometer of Crown Pallet Jack
The potentiometer (POT) detects how much the handle is being moved and sends that information to the control system. This allows the pallet jack to respond accordingly and move in the desired direction.

👉 Replacing the Potentiometer:

Here’s a step-by-step guide to fix Crown Pallet Jack error code 853 by replacing the faulty potentiometer or throttle card:

1). Remove the switch cap – Start by unscrewing the bolts that attach the handle’s switch cap assembly to the pallet jack. This will allow you to detach the switch cap from the pallet jack handle so you can access the internal components.

2). Disconnect the electrical connectors – Once the switch cap is off, you’ll see cables and connectors that attach it to the internal electronics. Carefully remove these connectors so you can fully detach the switch cap assembly.

3). Take out the old potentiometer – Inside the switch cap you’ll find the potentiometer, which is the component that needs to be replaced. Remove the screws that hold the potentiometer in place so you can take it out.

Here’s how the Potentiometer on the Crown Pallet Jack looks like.

4). Install the new potentiometer – With the old potentiometer removed, put the new one in the same spot and secure it with screws. Make sure it is centered properly within the switch cap assembly.

5). Reconnect the electrical components – It’s tricky, but you’ll need to reconnect the cables and connectors to the new potentiometer in the same way they were attached originally. Take your time and be methodical here.

6). Reassemble the switch cap – With all the internal components back in place, you can now reattach the switch cap assembly to the pallet jack handle using the original bolts. Tighten everything back up and you should be good to go.

👉 Replacing the Throttle Card:

If simply replacing the potentiometer doesn’t resolve the 853 error code on your Crown pallet jack, then you need to replace the throttle card.

The throttle control card is responsible for regulating the speed and power of the pallet jack. It receives signals from the potentiometer and adjusts the motor’s output accordingly.

1). To do this, you’ll need to remove and open up the switch cap assembly on the handle (as explained above).

2). Inside, you’ll find a throttle card located right next to the potentiometer. The throttle card is a small, rectangular-shaped circuit board that controls the throttle input signal from the potentiometer. Over time, the solder joints and components on the card can fail, causing erratic throttle signals.

3). Carefully remove the old throttle card by unplugging the connector and unscrewing any mounting screws.

4). Install a new replacement throttle card, taking care to firmly seat the connector and secure the mounting screws.

5). Once the new throttle card is installed, reassemble the switch cap. With any luck, this should resolve that error code for good. Double-check that the throttle and speed control are working properly before putting your Crown pallet jack back into service.

Here’s how the throttle card on the Crown Pallet Jack’s handle cap assembly looks like.

Fix #2: Replace The Control Circuit Fuse (FU3)

An issue with the control circuit fuse can also cause Error Code 853 on the Crown Pallet Jack.

So make sure to check the condition of the control circuit fuse, also known as the FU3 fuse. This fuse provides power specifically to the pallet jack’s handle and control circuitry.

The FU3 fuse is typically located on the control panel or near the battery on the Crown Pallet Jack. It protects the control circuit from power surges and shorts. If the FU3 fuse is blown, it will cut power to the handle and prevent the pallet jack from operating properly, which can cause error code 853.

Here’s how to troubleshoot it:

1). Visually inspect the FU3 fuse for any signs of damage or a broken filament.

2). Use a multimeter to check for continuity through the fuse.

3). If the FU3 fuse is blown, replace it with an identical new fuse with the proper amperage rating. A blown fuse indicates there may be an underlying short or power issue in the control circuit that will need to be diagnosed and repaired.

4). Replacing the FU3 fuse may allow the pallet jack to operate normally again.

5). But if the error code returns, further electrical testing and troubleshooting will be required. Be sure to fully diagnose and repair any control circuit issues to prevent repeated fuse failure.

Fix #3: Check The Wiring For Any Opens or Shorts

When resolving error code 853 on a Crown pallet jack, you’ll need to check the wiring from the positive signal to CA205-3 and from B-NEG to CA205-2 for any openings or shorts.

CA205-3 and CA205-2 refer to specific pins on the motor controller circuit board that help regulate power to the electric drive motor. The positive signal wire provides power to CA205-3 while the B-NEG wire connects the motor to the ground via CA205-2.

If either of these wires is open (disconnected) or shorted (touching together or touching the ground), it can trigger the 853 error code and prevent the pallet jack’s motor from operating properly.

To check for open or shorted wires, first visually inspect the length of the wires for any obvious damage, cuts, or abrasions in the insulation that could cause a short. Use a multimeter set to continuity mode to test each wire end-to-end for continuity. If you find a break in continuity, that indicates an open wire. You can also use the multimeter to check for shorts between the wires or from each wire to a ground point.

If you confirm an open or short in either the positive signal or B-NEG wiring, you will need to repair or replace the damaged wire to restore proper operation and clear the 853 error code.

Fix #4: Confirm The Values In The Tiller Throttle Menu

Error code 853 can sometimes pop up due to changed value settings in the pallet jack’s computer system. To check if this is the culprit, you’ll need a handset controller for the pallet jack. Crown makes handset controllers that let you access the pallet jack’s computer menus and monitor values.

1). Using the handset, scroll down to the Monitor menu.

2). From there, go to the Tiller Throttle menu, and select Raw Tiller Throttle.

3). Check the value that appears. With the throttle in neutral, the value should be 0. As you move the throttle, the value should change accordingly.

If the values don’t seem right as you operate the throttle, then the likely cause is a faulty POT or potentiometer. The POT is what tells the computer the throttle position. When it goes bad, it can send incorrect values to the computer, resulting in error 853. Replacing the POT, also called the throttle potentiometer, will restore normal operation.

Fix #5: Check The Harnesses and Connections

Harness issues are very common on the old Crown pallet jack models. The wiring harnesses on these older jacks are prone to failure, causing error code 853.

Make sure to check down by the knuckle/pivot point for any wires that may have rubbed through. Also, spray some DeoxIT Gold on all the connectors on the circuit boards. DeoxIT is a contact cleaner, lubricant, and anti-oxidizing solution that can help improve electrical connections. After doing that, recalibrate and see if the code clears up.

If that doesn’t fix it, the potentiometers (POTs) are likely bad. The new replacement POTs come in a kit with new stops for the twist grip. The old stops can wear out which lets the POT rotate beyond its normal range, causing damage. You may need to replace the POT again if the stops are worn.

Most harness issues were fixed in later Crown models. But it helps to know exactly when the 853 code pops up – like only when turning one way or the other. On the older jacks, harnesses often rubbed through under the handle assembly, where they contact the frame. Also, check the harness at the handle stem pivot point. These failure points aren’t always obvious. Intermittent fuse blowing is also a sign of harness failure.

The key is to methodically check the harnesses and connections. DeoxIT and calibration may do the trick. If not, replacing the POT and stops is the next step. Later Crowns improved the harnesses so 853 is less common. But on those temperamental older models, harness, and POT issues are where I’d start troubleshooting.

Conclusion

In conclusion, resolving error code 853 on a Crown pallet jack demands a methodical approach that addresses a range of potential causes, from faulty components to wiring issues and beyond. By conducting thorough inspections and implementing the appropriate fixes, operators can restore optimal functionality to their pallet jacks and ensure smooth operations in their material handling tasks.

Thank you for reading! If you encounter any further issues or have additional questions, please feel free to leave your queries in the comment section below. Our pallet jack expert will be on hand to provide assistance and guidance.

Toyota Forklift Error Code E06-1, E06-2 Troubleshooting Guide

E06-1 and E06-2 on a Toyota Forklift are simply indicators that it’s time for a throttle check. Follow our expert advice for a hassle-free troubleshooting experience, and you’ll have your forklift performing at its best in no time.

Error Code E06-1 and E06-2 on Toyota Forklift: The 3 Main Causes

The best running forklift is thanks to knowing your codes. Remember that E06-1 or E06-2 on the Toyota’s dash is not to be ignored as they are your lift truck’s way of saying something urgent by waving a red flag. Let’s look at what these codes mean and which parts they relate to, so your forklift stays in tip-top condition.

An illustration of the portion related to Toyota Forklift Error Code E06-1 and E06-2.

1). Throttle Motor Issue:

The throttle motor in a forklift controls the airflow to the engine, which manages the engine’s power and speed. If there’s an issue with the throttle motor, your Toyota Forklift might show error codes E06-1 and E06-2. This problem can make the engine act up, reduce efficiency, or even totally lose power. That makes it hard to operate the forklift safely and effectively.

2). Wiring Harness Issue:

In forklifts, a wiring harness is the network of wires and connectors that send electrical signals and power through the vehicle. If there’s an issue with the harness, like damaged wires or loose connections, it can mess up communication between different forklift parts. This could set off the E06-1 and E06-2 error codes and could cause the electrical systems to partially or completely fail. That leads to operation problems and potential safety issues.

3). Engine Controller Issue:

The engine controller is basically the forklift’s computer. It manages different engine functions to keep everything running smoothly. An issue with the engine controller could make error codes E06-1 and E06-2 show up. This problem could lead to improper engine management, impacting performance, fuel efficiency, and emissions. In bad cases, it could stop the forklift from starting or make it stall while operating.

Resetting Guide

To resolve the error codes E06-1 or E06-2 on a Toyota Forklift, resetting the fault codes can often remedy the issue. However, if the errors continue to appear, it may indicate a malfunctioning throttle or wiring harness connectivity problem that requires troubleshooting.

Here’s how to reset an E06 error on a Toyota Forklift:

  1. The first step is to disconnect the negative battery terminal for at least 10 seconds. This resets the forklift’s computer system and clears any stored error codes.
  2. Next, disconnect the water inlet to parts G6 and AG1. Inspect these connections – they bring water into the system for cooling, so any blockages or leaks here can cause overheating issues that trigger an E06 code.
  3. Reconnect any loose connections. Make sure there’s no corrosion or damage.
  4. Reconnect the water inlet tubes and battery negative terminal.
  5. Then, turn the ignition key to the “ON” position to start the engine and check if any error codes are displayed.
  6. If no errors appear, the issue was likely a loose or corroded connector in the wiring harness. Connector issues can disrupt signals to the forklift’s computer and throttle, causing error codes. Tightening or cleaning the connectors should resolve the problem and prevent the error from returning.
  7. But if the E06 error remains, there is likely an internal issue with the throttle motor or wiring harness. Further troubleshooting of the throttle and harness circuits will be needed to pinpoint the root cause.

The key points are to first reset the error code, and then inspect the water inlet connections. If the error returns, it indicates a deeper issue that requires advanced troubleshooting of the throttle and wiring.

E06-1 and E06-2 Error Code Troubleshooting Guide

As shared above, error code E06-1 or E06-2 in most cases boils down to one of three components – the throttle motor, wiring harness, or engine control unit. The tricky part is figuring out which one. Instead of a shotgun approach, let’s walk through the step-by-step troubleshooting guide.

I’ll explain the telltale signs of each potential culprit, tests to perform, and how to zero in on the root cause. By working together to isolate the source of the problem, you can get your forklift operating optimally once again.

1). Throttle Motor Resistance Inspection

First up, you need to carry out a throttle motor inspection. This involves testing the motor itself separately from the rest of the system.

  1. To do this, turn the ignition key switch OFF first.
  2. Then, disconnect connector G6 and connect connector G27 instead. G6 is the main throttle motor connector while G27 allows us to test the motor individually.
  3. Now we can check the throttle motor resistance.
  4. Use your multimeter probes to measure between pins G6-2 and G6-1 on the motor side.
  5. The standard readings we’re looking for are: 0.3 to 100 ohms at 20°C.
  6. We want the resistance reading to be somewhere between 0.3 and 100 ohms when the motor is at room temperature. If the reading is way outside this range, there’s likely an issue with the motor’s resistance internally. This could be due to worn-out windings or bad connections.
G6-2 ~ G6-10.3 ~ 100 Ω (20°C)
The throttle motor should show these resistance readings (Motor side).

When resistance is the culprit, there are a few ways you can get things back in shape:

  • Clean the motor connectors and pins to clear any corrosion or dirt buildup causing high resistance. Use electrical contact cleaner spray.
  • Test the motor windings for opens or shorts. If found, the motor will likely need replacement.
  • Check wiring between the motor and ECU for damage that could introduce resistance. Repair any cuts, fraying, etc.

The key is zeroing in on any resistance abnormalities and eliminating their cause.

2). Throttle Valve Drive Condition Inspection

If the throttle motor checks out okay, the next step is to take a look at the throttle valve. There are a couple of standard checks to perform to ensure the valve is working right:

1. The throttle valve should operate smoothly when fully opened. This means when you push the throttle down, it should move smoothly without catching or sticking. If it does not operate smoothly, it could indicate a mechanical issue like binding, contamination, or wear and tear.

2. The throttle valve should operate smoothly when fully closed. Similarly, when you let off the throttle and it returns to the closed position, it should move smoothly back to closure. Any sticking, catching, or uneven movement could signify a problem.

3. The throttle should return to opener angle when released. When you let go of the throttle, it should spring back to the idle/opener angle position. If it sticks part-way, doesn’t return at all, or goes past the opener angle, it suggests an issue with the return spring or mechanism.

Overall, the throttle valve needs to move through its full range of motion smoothly and precisely, both when actuated and when returning. Any deviation from the standard values indicates a potential issue needing diagnosis and repair. Binding, sticking, contamination in the mechanism, or spring and linkage wear could all contribute to abnormal operation.

3). Harness Continuity and Short-Circuiting Inspection

Once you’ve ruled out problems with the throttle motor and throttle valve drive on your Toyota forklift, it’s likely an electrical issue triggering the E06-1 and E06-2 error codes. The wiring harness, which relays power and signals through the forklift, may have continuity or short circuit problems.

Here’s how to inspect the harness for continuity and short-circuiting:

1. Turn the ignition key switch to the OFF position.

    2. Disconnect connectors G27 and G6.

    3. Then, use a multimeter to check for continuity between the following points:

    • G27-6 to G6-2: You should find continuity here.
    • G27-5 to G6-1: Continuity should also be present here.

    4. You should also ensure there is no continuity between these points:

    • G27-6 to the Frame
    • G27-5 to the Frame
    • G27-6 to G27-5
    • G27-6 to G27-7
    • G27-5 to G27-7
    G27-6 ~ G6-2Continuity
    G27-5 ~ G6-1Continuity
    G27-6 ~ FrameNo Continuity
    G27-5 ~ FrameNo Continuity
    G27-6 ~ G27-5No Continuity
    G27-6 ~ G27-7No Continuity
    G27-5 ~ G27-7No Continuity
    The table lists standard continuity and short circuit readings for harness inspections.

    If any of those readings are out of spec, there’s likely a wiring issue causing the E06-1 code. A break in continuity means there’s an open circuit, while unwanted continuity points to a short circuit. Make sure to thoroughly inspect the harness connectors and wires. Look for chafing, bare wires, corroded terminals, etc. Repair or replace any damaged wiring as needed.

    Summary

    When you see the E06-1 and E06-2 error codes flashing on your Toyota forklift, it’s a sign that something’s up with the throttle system. These codes mean there could be issues with the throttle motor, wiring, or engine control unit. To fix it, you need to follow some steps. First, reset the error code. Then, check the water inlet connections. After that, test the throttle motor’s resistance and valve. Finally, inspect the wiring harness for any issues. By doing these steps, you can find out what’s wrong and get your forklift back to working well and safely.

    Toyota Forklift E02-1, E02-2 Troubleshooting Guide

    Error codes E02-1 and E02-2 can disrupt Toyota forklift operations and lead to frustration. This post sheds light on these error codes and provides you with a practical approach to resolving them. Explore the resetting guide, troubleshooting tips, and essential knowledge to solve error codes 02-1 and 02-2 in the Toyota forklift.

    Error Codes E02-1 and E02-2 on Toyota Forklift

    Error codes 02-1 and 02-2 on a Toyota Forklift indicate an abnormality in the intake temperature sensor. In simpler terms, this means that there is an issue with the sensor responsible for measuring the temperature of the air going into the forklift’s engine.

    When the intake temperature sensor malfunctions, it can have a noticeable impact on the Toyota forklift’s performance. The engine may experience difficulties in adjusting the air-to-fuel ratio, leading to suboptimal combustion and reduced power output. This can result in decreased acceleration, lower overall performance, and potentially even engine stalling or hesitation during operation.

    An illustration of the portion related to Toyota forklift error codes 02-1 and 02-2.

    Several factors can contribute to the occurrence of 02-1 and 02-2 error codes. The most common causes include a defective intake temperature sensor itself, a faulty wiring harness connecting the sensor, or a defect in the engine controller responsible for interpreting sensor signals. Identifying and addressing these underlying issues is essential for solving the E02-1 and E02-2 fault codes in the Toyota forklift.

    Probable Causes

    There are three main causes of the E02-1 and E02-2 error messages on the Toyota forklift.

    • Intake temperature sensor defect
    • Harness defect
    • Engine controller defect

    Resetting Guide

    To reset error codes 02-1 and 02-2 on a Toyota forklift, follow these steps:

    1. Disconnect the battery negative terminal and wait for more than 10 seconds.
    2. Inspect and correct any disconnection or water entry issues in connectors C3 and AC2.
    3. Reconnect all connectors, ensuring they are securely attached.
    4. Reconnect the battery negative terminal.
    5. Turn the ignition key switch to the ON position and start the engine.
    6. Check whether the error codes have cleared.

    If resetting successfully clears the error codes, it indicates a possible connector contact defect. To resolve this issue, thoroughly inspect the connectors, ensuring they are clean, free from corrosion, and making proper contact. Address any defects or connection issues, and then retest the forklift to ensure the error does not reappear.

    However, if the error codes persist even after resetting, further troubleshooting is required. In such cases, it is recommended to inspect the intake temperature sensor and its harness for any defects, such as physical damage or loose connections. Additionally, check for short circuit continuity in the sensor and harness. Detailed instructions for troubleshooting these components can be found below.

    Troubleshooting Guide

    Resolving error codes 02-1 and 02-2 on a Toyota forklift requires a systematic inspection of the following components:

    a). Intake Temperature Sensor Individual Inspection

    The intake temperature sensor plays a crucial role in the forklift’s operation. It measures the temperature of the air being drawn into the engine, providing important data to the engine controller for optimizing fuel-air mixture and combustion. Incorrect readings from this sensor can trigger error codes and adversely affect the forklift’s performance.

    To carry out the intake temperature sensor individual inspection, follow these steps:

    1). Ensure the ignition key switch is in the OFF position.

    2). Disconnect connector C3 and connect connector A35.

    3). Using a multimeter, measure the resistance between terminals C3-1 and C3-2.

    4). The readings should be approximately 2.45 ± 0.24 kilo-ohms at 20°C (room temperature) and 0.32 ± 0.03 kilo-ohms at 80°C (higher temperature).

    C3-1 ~ C3-22.45 ± 0.24 kΩ (20°C)
    0.32 ± 0.03 kΩ (80°C)

    5). By checking these resistance values, you can determine if the intake temperature sensor is functioning correctly. Any significant deviation from the specified readings may indicate a defect in the sensor, requiring further investigation and potential replacement.

    b). Harness Continuity and Short Circuit Inspection

    The harness connects various components, including the sensor, to the engine controller. Any issues with the harness can disrupt the flow of electrical signals and trigger error codes 02-1 and 02-2.

    To conduct the harness continuity and short circuit inspection, follow these steps:

    1). Ensure the ignition key switch is in the OFF position.

    2). Disconnect connectors A35 and C3.

    3). Measure the continuity between terminal A35-29 and C3-2. There should be continuity, indicating a proper connection.

    4). Measure the continuity between terminal A35-28 and C3-1. There should also be continuity between these terminals.

    5). Measure the continuity between terminal A35-29 and the frame of the forklift. There should be no continuity, indicating no direct connection to the frame.

    A35-29 ~ C3-2Continuity
    A35-28 ~ C3-1Continuity
    A35-29 ~ FrameNo continuity

    6). By performing these continuity tests, you can verify that the harness is properly connected and not experiencing any short circuits. If any continuity or short circuit issues are detected, further inspection and potential repairs or replacements may be necessary to rectify the problem.

    Summary

    Error codes E02-1 and E02-2 indicate an issue with the intake temperature sensor of the Toyota forklift. These fault codes can arise from a defective sensor, a faulty wiring harness, or a malfunctioning engine controller. If resetting doesn’t clear the error, the troubleshooting includes inspecting the intake temperature sensor and its harness for defects and checking for short circuits. 

    Without resolving these errors, the engine may experience difficulties in adjusting the air-to-fuel ratio, leading to inefficient combustion. This can result in reduced power output, decreased acceleration, and overall lower performance of the forklift. In some cases, the engine may even stall or hesitate during operation, hindering productivity in a warehouse or industrial setting.

    Toyota Forklift Error Code E01-6 Troubleshooting Guide

    The Toyota Forklift error code 01-6 is an alert of something wrong with your Toyota Forklift.

    The E01-6 is either detected via the OBDII code reader or pops up in the forklift’s control panel display.

    This article here shares complete information on the E01-6 fault code on Toyota Forklift – what does it mean, how to reset it, and how to troubleshoot.

    Error Code E01-6 on Toyota Forklift

    Error Code E01-6 on a Toyota forklift indicates an O2 sensor heater open abnormality.

    The O2 sensor measures the oxygen content in the exhaust gases and provides feedback to the engine control unit (ECU). This information helps the ECU adjust the air-fuel mixture to optimize combustion efficiency. The heater is responsible for heating the O2 sensor to its operating temperature quickly, allowing it to generate a voltage signal.

    An illustration of the portion related to Toyota Forklift Error Code E01-6.

    An O2 sensor heater malfunction can have several effects on the forklift’s performance:

    • It can lead to inaccurate readings from the O2 sensor, causing the engine to run inefficiently. This can result in decreased fuel efficiency, reduced power, and increased emissions.
    • It may prevent the engine from entering closed-loop operation, where it relies on the sensor’s feedback for precise fuel control.

    A properly functioning O2 sensor and heater allow the engine control system to make accurate adjustments, leading to better fuel economy, performance, and reduced emissions. Ignoring or delaying the repair can result in decreased efficiency, increased fuel consumption, and potential damage to other engine components over time. Therefore, it is important to address the issue promptly and have it resolved by a qualified technician or service center.

    Probable Causes

    Toyota Forklift O2 sensor heater open abnormality can occur due to one of three reasons, triggering the E01-6 code.

    1. O2 sensor defect – refers to a failure of the oxygen sensor
    2. Harness defect – refers to a wiring issue, such as a loose or broken connection
    3. Engine controller defect – refers to a failure of the engine control module (ECM) or electronic control unit (ECU)

    Resetting Guide

    Resetting Toyota Forklift fault code E01-6 is a quick and easy fix to address an issue, but if it persists, it may indicate a faulty part or sensor that needs replacement.

    Here are the steps on how to reset the E01-6 error code on a Toyota forklift.

    1. Disconnect the negative battery terminal for 10 seconds.
    2. Inspect C1 and AC2. Check for any loose or broken connections, as well as signs of water entry or moisture damage.
    3. Reattach any disconnected connectors and then reconnect the battery’s negative terminal.
    4. Start the engine.
    5. This will reset the Toyota Forklift E01-6 error.

    Troubleshooting Guide

    In some cases, following the aforementioned reset instructions can resolve the error. However, if the error persists, it is necessary to proceed with troubleshooting to identify and address the underlying issue. Follow the inspection process in sequential order.

    1). O2 Sensor Individual Inspection

    Carry out an individual inspection of the O2 sensor. The O2 sensor is responsible for measuring the oxygen content in the exhaust gases, providing essential feedback for optimal fuel-air mixture regulation and emission control. A defective O2 sensor leads to poor fuel economy, increased emissions, and performance issues.

    To conduct the inspection, follow these steps:

    a). Turn off the ignition key switch.

    b). Disconnect connector C1.

    c). Connect connector A35.

    d). Take the O2 sensor readings.

    e). Ensure the following standard readings are within the specified range:

    C1-2 ~ C1-113 ~ 16 Ω (20°C)
    Resistance between terminals C1-2 and C1-1 should be between 13 to 16 Ω at a temperature of 20°C.

    A faulty O2 sensor can also trigger E01-5. Read more about Toyota Forklift error code E01-5 here.

    👉 If the error code is resolved, it’s good.
    Otherwise, move to the next inspection step below.
    ⬇️⬇️⬇️

    2). O2 Sensor Heater Power Voltage Inspection

    Inspect the O2 sensor heater power voltage. The O2 sensor’s heater is responsible for reaching and maintaining the optimal operating temperature of the sensor. The heater ensures the proper functioning of the O2 sensor.

    To perform the inspection, follow these steps:

    a). Turn off the ignition key switch.

    b). Disconnect connector C1.

    c). Connect connector A35.

    d). Start the engine.

    e). Take voltage readings. The expected voltage readings should be between 8 to 16 V:

    C1-2 ~ Frame8 ~ 16 V

    A poor voltage power in the O2 sensor heater can also trigger E01-4. Read more about Toyota Forklift error code E01-4 here.

    👉 If the error code is resolved, it’s good.
    Otherwise, move to the next inspection step below.
    ⬇️⬇️⬇️

    3). Harness Continuity and Short Circuit Inspection

    Inspect the harness for continuity and short circuits. Harness continuity refers to ensuring that there is a continuous flow of electrical current through the wiring harness without any breaks or interruptions. Short circuits, on the other hand, occur when there is an unintended connection between two wires or terminals, causing electrical current to flow where it shouldn’t.

    Inspecting the harness for continuity and short circuits ensures proper electrical connections and prevents issues such as electrical malfunctions, circuit failures, or potential damage to the forklift’s components.

    To perform the inspection, follow these steps:

    a). Turn off the ignition key switch.

    b). Disconnect connector A35.

    c). Disconnect connector C1.

    d). Check for continuity.

    e). Ensure there is continuity between A35-6 and C1-1, indicating a proper electrical connection. 

    f). At the same time, there should be no continuity between A35-6 and Frame, ensuring there are no unintended connections.

    A35-6 ~ C1-1Continuity
    A35-6 ~ FrameNo continuity

    Summary Points

    The Toyota Forklift error code E01-6 indicates an O2 sensor heater open abnormality.

    The O2 sensor measures the oxygen content in exhaust gases, providing feedback to the engine control unit (ECU) for optimal fuel-air mixture regulation.

    The error can be caused by a defective O2 sensor, a harness defect, or an engine controller defect.

    Resetting the error code involves disconnecting the negative battery terminal and inspecting connectors C1 and AC2 for loose connections or water damage.

    If the error persists, further troubleshooting is required. This includes individual inspections of the O2 sensor, checking the O2 sensor heater power voltage, and inspecting the harness for continuity and short circuits.

    Proper maintenance and timely resolution of the error are crucial to ensure optimal performance, fuel efficiency, and reduced emissions in the Toyota Forklift.

    Toyota Forklift Error Code E01-5: How To Clear This Fault Code?

    Toyota Forklift has a diagnostic system that can detect issues such as error code E01-5. This article discusses the E01-5 forklift fault code in detail, its resetting guide, and how to troubleshoot it.

    Understanding this error code and its diagnosis will help keep the forklift running smoothly.

    Error Code E01-5 on Toyota Forklift

    Error Code E01-5 on Toyota Forklift indicates an O2 sensor open abnormality. This means that the oxygen sensor is not receiving the return signal from the computer, which can be caused by a harness defect (broken wire or dirty connectors), a failed O2 sensor, or a defective ECM.

    When this error occurs, the engine speed can become unstable or it may even stop. This can limit the speed of traveling and materials handling due to limited engine power output.

    An illustration of the portion related to Toyota Forklift Error Code E01-5.

    It is therefore important to ensure that the O2 sensor functions properly, to maintain the performance of the engine and keep its operator safe.

    Probable Causes

    There are 3 main possible causes of the E01-5 error message on the Toyota Forklift:

    1. O2 Sensor defect 
    2. Harness defect 
    3. Engine controller defect

    Resetting Guide

    Resetting fault code E01-5 can often clear the issue. But if the error persists, it may indicate a faulty part or sensor that needs to be replaced. Here are the steps to reset the error code E01-5 on a Toyota Forklift:

    1. Disconnect the negative terminal of the battery for more than 10 seconds.
    2. Check the connection status of the C1 connector.
    3. Disconnect C1 and perform a visual and contact pressure inspection of the connector.
    4. Short circuit the service connector TC terminal with the E1 terminal.
    5. Connect C1 and the battery negative terminal. Note: For combination vehicles, switch the fuel changeover switch to gasoline.
    6. Turn the ignition key switch ON (engine stopped).
    7. Depress the accelerator pedal 5 times fully (from fully open to fully closed) within 30 seconds.
    8. Start the engine and check that the error has been cleared.
    9. Disconnect the battery negative terminal again.
    10. Disconnect the TC and E1 terminals.
    11. Reconnect the battery negative terminal.
    12. Start the engine and let it idle for a few minutes.
    13. Fully depress the accelerator pedal for 3 minutes with the direction neutral. Then release and leave the accelerator pedal.
    14. Run the engine at idle for 2 minutes.
    15. Repeat steps (13) and (14) for 3 times.
    16. Turn the ignition key switch OFF and leave it off for one minute.
    17. Repeat steps (12 to 16) for 3 times.
    18. This will clear the E01-5 fault code.

    Troubleshooting Guide

    Resetting the E01-5 error code on your Toyota Forklift is often the solution to the issue. In case resetting this code does not work, troubleshooting the issue can resolve the problem. To troubleshoot the problem, you should follow the inspection process in sequential order.

    1). Connector Contact Inspection

    The connector is a crucial component in a forklift’s electrical system that helps to establish a reliable connection between different parts of the system. It plays a critical role in ensuring that the various electrical signals are transmitted accurately and consistently, which is essential for the proper functioning of the forklift.

    A defective Connector contact could result in triggering the e015-error code on Toyota Forklift. Its fix typically involves replacing the damaged component with a new one.

    👉 If the error code is resolved, it’s good.
    Otherwise, move to the next inspection step below.
    ⬇️⬇️⬇️

    2). Harness Continuity and Short Circuit Inspection

    The harness continuity refers to the uninterrupted flow of electrical signals through the wiring harness of the forklift. To ensure proper forklift performance, it’s important to address any breakage or damage in the harness, which could result in issues such as the e01-5 error code.

    To inspect for continuity and short-circuiting of the harness, it is necessary to turn off the ignition key switch and disconnect the A35 and C1 connectors. This will allow for a thorough inspection of the wiring harness.

    Standard readings are:

    A35-20 ~ C1-3Continuity
    A35-21 ~ C1-4Continuity
    A35-20 ~ FrameNo Continuity

    The fix would be to repair or replace the damaged harness to ensure the uninterrupted flow of electrical signals.

    👉 If the error code is resolved, it’s good.
    Otherwise, move to the next inspection step below.
    ⬇️⬇️⬇️

    3). O2 Sensor Inspection for Connector Contact Defect

    The O2 sensor voltage inspection is a diagnostic procedure used to determine if the oxygen (O2) sensor in a Toyota forklift is functioning correctly.

    The O2 sensor measures the amount of oxygen in the exhaust gas to help the engine control system adjust the air/fuel mixture for optimal combustion.

    The connector connection plays a crucial role in transmitting the voltage signal from the O2 sensor to the engine control module. A faulty connector can cause voltage signal interference, leading to the engine control system receiving incorrect readings.

    1. To inspect the O2 sensor voltage output, start by connecting A35 and C1. 
    2. Then, start the engine and let it warm up completely. 
    3. Set the direction to neutral and fully press the accelerator pedal. 
    4. Measure the O2 sensor voltage using the I/O monitor: OX. 
    5. The Standard Voltage Readings should be: OX 0.4 V or less and 0.5 V or more alternately output. 
    6. If the readings are outside of this range, then there may be a problem with the connectors that connect the O2 sensor to the ECM.

    👉 If the error code is resolved, it’s good.
    Otherwise, move to the next inspection step below.
    ⬇️⬇️⬇️

    4). O2 Sensor Voltage Inspection for Engine Controller Defect

    If the connector contact is functioning properly, you can assess any defects in the engine controller by taking O2 sensor voltage readings.

    In the case of a Toyota forklift, an engine controller defect may trigger an error code, as it regulates the air-fuel mixture and monitors the O2 sensor’s output.

    An engine controller defect can cause the check engine light to appear, and E01-5 or E01-1 or E01-2 codes to be generated due to incorrect voltage levels in the O2 sensor readings.

    To inspect the output of an O2 sensor in a Toyota forklift for checking engine controller defect, you can follow these steps:

    1. Disconnect the C1 connector.
    2. Connect a voltmeter or an oscilloscope probe to pin A35 of the connector.
    3. Start the engine and let it warm up completely.
    4. Set the direction of the forklift in neutral.
    5. Fully open the accelerator pedal.
    6. Read the O2 sensor voltage on the voltmeter or oscilloscope.
    7. The standard voltage readings should be OX 0.2 V or less (I/O monitor: OX).

    Summary

    The Toyota Forklift’s E01-5 error code provides valuable information about the specific issue affecting the O2 sensor. By identifying an open abnormality in the sensor, the error code helps diagnose potential problems such as a faulty harness due to dirty connectors or broken wires, a malfunctioning O2 sensor, or a flawed ECM. This allows for targeted and effective troubleshooting to restore the forklift’s optimal functioning. While resetting the fault code may sometimes fix the problem, persistent occurrences may indicate the need to replace a defective part or sensor.

    To identify the issue, the article recommends examining the connector contact, testing the harness for continuity and short-circuits, and inspecting the O2 sensor for connector contact issues. To ensure optimal performance, it is recommended to check the engine controller if the issue persists.

    Toyota Forklift Error Codes E01-1, E01-2, E01-3, E01-4: How To Clear These Fault Codes?

    As a Toyota forklift operator or mechanic, you know that occasional errors are a natural part of the job. It’s worth noting that E01-1, E01-2, E01-3, and E01-4 are common errors that you might encounter, but they’re not insurmountable challenges. These Toyota forklift error codes can be a headache, but fortunately, with a little troubleshooting, you can have your Toyota forklift up and running in no time.

    Fortunately, in this guide, we’ll examine these errors in detail, clarify their meanings, and provide guidance on how to reset them.

    So, whether you’re a forklift operator or a mechanic who’s eager to master the troubleshooting process of E01-1, E01-2, E01-3, and E01-4 errors on Toyota forklifts, keep reading!

    Errors E01-1, E01-2, E01-3, E01-4 on Toyota Forklift

    The Toyota forklift’s E01-1, E01-2, E01-3, and E01-4 codes suggest issues with the fuel delivery system or Fuel Feedback Control Abnormalities, but they’re not problems without solutions. If the forklift is consuming rich gasoline, it could trigger E01-1, whereas using lean gasoline could result in E01-2. On the other hand, Toyota forklifts running on rich or lean LPG can experience E01-3 and E01-4, respectively.

    Toyota Forklift Error Codes E01-1, 01-2, 01-3, 01-4
    An illustration of the portion related to Toyota Forklift Error Codes E01-1, 01-2, 01-3, 01-4

    When the fuel feedback control system malfunctions, the engine may receive inaccurate information about the amount of fuel necessary to maintain a steady speed, leading to errors. This causes the Toyota forklift’s engine to stall or run erratically.

    If you encounter these E01-1 to E01-4 error codes, it’s important to take action quickly to prevent further damage to your forklift and ensure that it’s safe to operate.

    Probable Causes

    Toyota forklift error codes E01-1, 01-2, 01-3, and E01-4 indicate one or more of the following different malfunctions.

    • Intake System Defect
    • Exhaust System Defect
    • Sensor Defect
    • Ignition Defect
    • Fuel System Defect
    • Harness Defect
    • Engine Controller Defect

    Resetting Guide

    Fortunately, resetting these codes can solve the issue. However, if the problem persists, it might indicate a faulty part or sensor that requires replacement. Here are the simple steps to reset error codes E01-1, E01-2, E01-3, or E01-4 on a Toyota Forklift:

    1. Disconnect the negative terminal of the battery for more than 10 seconds.
    2. Check the connection status of the C1 connector.
    3. Disconnect C1 and perform a visual and contact pressure inspection of the connector.
    4. Short circuit the service connector TC terminal with the E1 terminal.
    5. Connect C1 and the battery negative terminal. Note: For combination vehicles, switch the fuel changeover switch to gasoline.
    6. Turn the ignition key switch ON (engine stopped).
    7. Depress the accelerator pedal 5 times fully (from fully open to fully closed) within 30 seconds.
    8. Start the engine and check that the error has been cleared.
    9. Disconnect the battery negative terminal again.
    10. Disconnect the TC and E1 terminals.
    11. Reconnect the battery negative terminal.
    12. Start the engine and let it idle for a few minutes.
    13. Fully depress the accelerator pedal for 3 minutes with the direction neutral. Then release and leave the accelerator pedal.
    14. Run the engine at idle for 2 minutes.
    15. Repeat steps (13) and (14) for 3 times.
    16. Turn the ignition key switch OFF and leave it off for one minute.
    17. Repeat steps (12 to 16) for 3 times.
    18. This will reset the E01-1 or E01-2 on the Toyota Forklift.

    Troubleshooting Guide

    If for some reason the error code does not resolve by resetting it, don’t worry. You can move on to a more detailed troubleshooting process. This process involves inspecting different sensors and parts of the forklift to identify the root cause of the issue.

    It is important to note that the inspection steps need to be followed in an accurate sequence to ensure that you do not miss any potential issues. Therefore, it is recommended that you start inspecting your Toyota forklift in the following sequence:

    1). Air Intake Inspection

    The method of troubleshooting starts with an air intake inspection. Simply start the forklift’s engine and check if there’s a presence of air being sucked in from the engine oil level gauge, oil filler cap, or PCV hose. As well as the connections between the air cleaner and the cylinder head.

    Remember, there must be no air being sucked in as this can cause an imbalance in the air-fuel ratio, leading to an incorrect fuel feedback control. This can cause your Toyota forklift’s engine to misfire and result in the e01 error codes being triggered.

    If air is being sucked into the system, the next step is to identify the source of the problem and make the necessary repairs. This may involve replacing damaged or worn components, such as hoses, seals, or gaskets, or cleaning or replacing the air filter.

    👉 If the error code is resolved, good.
    Otherwise, proceed to the next inspection step below.
    ⬇️⬇️⬇️

    2). Exhaust Gas Leakage Inspection

    The Exhaust Gas Leakage Inspection is a diagnostic process that involves starting the engine and checking if there is any exhaust gas leakage from the exhaust system parts and connections between the cylinder head and the catalytic muffler.

    Exhaust gas leaks can be prevented with proper maintenance and can help ensure optimal engine performance, improved fuel efficiency, and reduced emissions. In addition, taking steps to prevent exhaust leaks can also help protect the health and safety of operators and other personnel who may be exposed to toxic fumes.

    👉 If the error code is resolved, good.
    Otherwise, proceed to the next inspection step below.
    ⬇️⬇️⬇️

    3). Fuel Leakage Inspection

    Regular maintenance can help prevent fuel leakage in forklifts and promote increased fuel efficiency, reliable engine performance, and decreased environmental pollution. Moreover, ensuring proper fuel system maintenance can help prevent workplace accidents and minimize the risk of fire hazards.

    To troubleshoot Toyota Forklift errors between E01-1 and E01-4, the first step is to start the engine and visually inspect the fuel system parts and connections between the fuel pump and injectors for any signs of fuel leakage. If fuel is detected, it’s important to identify the source of the problem and fix it immediately to prevent further damage or safety risks.

    👉 If the error code is resolved, good.
    Otherwise, proceed to the next inspection step below.
    ⬇️⬇️⬇️

    4). Fuel Pressure Inspection (for Gasoline) / Regulator Primary Pressure Inspection (for LPG)

    Toyota Forklift error codes E01-1 and E01-2 can be useful indicators of potential fuel system issues. By identifying and addressing problems with components such as the pressure regulator, fuel filter, or fuel pump, forklift operators can help ensure optimal performance and efficiency.

    Fixing pressure regulator defects can help promote proper fuel pressure and prevent performance issues while resolving fuel filter defects can help prevent blockages and maintain the fuel flow. Similarly, addressing fuel pump defects can help ensure proper fuel pressure, improve efficiency, and prevent other performance problems in forklifts.

    To perform a fuel pressure inspection, you’ll need a fuel pressure gauge. First, locate the fuel pump and remove the fuel pressure regulator cap. Attach the fuel pressure gauge to the regulator cap, and then start the forklift to measure the pressure in the fuel system. You can then compare this reading to the manufacturer’s specifications to determine if the pressure is within the proper range.

    If fuel pressure is too high, it can cause excessive fuel consumption, engine damage, and even fires. On the other hand, if fuel pressure is too low, it can cause poor engine performance, decreased fuel efficiency, and stalling.

    👉 If the error code is resolved, good.
    Otherwise, proceed to the next inspection step below.
    ⬇️⬇️⬇️

    OR

    If the Toyota Forklift is running on LPG/CNG and is displaying error codes E01-3 or E01-4, it could indicate a regulator defect. In this case, the following steps can be taken to perform a regulator primary pressure inspection:

    1. Allow the forklift to cool down by turning it off before starting the inspection.
    2. Locate the pressure regulator on the fuel system.
    3. Disconnect the fuel supply hose from the regulator inlet.
    4. Attach a pressure gauge to the regulator inlet.
    5. Turn on the forklift and let it idle.
    6. Observe the pressure gauge reading and compare it to the manufacturer’s specifications.
    7. If the pressure reading is within the acceptable range, the regulator’s primary pressure is functioning correctly. If not, the regulator may need to be replaced.
    8. Reconnect the fuel supply hose to the regulator inlet and turn off the forklift.

    👉 If the error code is resolved, good.
    Otherwise, proceed to the next inspection step below.
    ⬇️⬇️⬇️

    5). Spark Plug Individual Inspection

    The Toyota forklift’s spark plugs are responsible for igniting the fuel-air mixture in its combustion chamber. A well-maintained spark plug with sufficient gap enhances engine performance, preventing misfires.

    To ensure the spark plugs are functioning properly, it is important to carry out a spark plug individual inspection. This involves inspecting the spark plug for any signs of wear or damage, such as cracks, carbon deposits, or corrosion. To ensure good engine performance, replace the spark plug if any warning signs appear.

    To inspect the spark plugs of a Toyota forklift, follow these steps:

    1. Turn off the engine and let it cool down.
    2. Locate the spark plugs on the engine. The number of spark plugs will depend on the type of engine installed in the forklift.
    3. Remove the spark plug wires or ignition coils to access the spark plugs.
    4. Check the condition of the spark plugs for any signs of wear, damage, or fouling.
    5. If the spark plugs are dirty, clean them with a wire brush or replace them if necessary.
    6. Reconnect the spark plug wires or ignition coils.
    7. Start the engine and ensure that it’s running smoothly without error codes.

    👉 If the error code is resolved, good.
    Otherwise, proceed to the next inspection step below.
    ⬇️⬇️⬇️

    6). Injector Individual Inspection

    Injectors are critical components of the engine in a forklift and are responsible for delivering the precise amount of fuel to the engine cylinders.

    When a Toyota forklift experiences an error code ranging from E01-1 to E01-4, it could mean that there is a problem with one or more of the injectors.

    Inspecting the injectors individually involves removing each injector and checking its condition. Look for signs of wear and tear, damage, or clogging in the nozzle or spray tip. Also, inspect the fuel inlet and outlet ports for any obstructions or blockages. Ensure that the injectors are clean and that the spray pattern is uniform.

    👉 If the error code is resolved, good.
    Otherwise, proceed to the next inspection step below.
    ⬇️⬇️⬇️

    7). Intake Pipe Pressure Sensor Voltage Inspection

    The intake pipe pressure sensor is an important component of the engine control system that measures the air pressure in the intake manifold. It provides feedback to the engine control unit (ECU) to adjust the air-fuel mixture and ensure optimal performance. The intake pipe pressure sensor can fail due to various reasons such as wear and tear, damage, or wiring issues. When the sensor fails, it can cause the ECU to receive incorrect data, resulting in the engine running rough and leading to the E01-2 or E01-3 error code.

    To diagnose this issue, it is important to inspect the intake pipe pressure sensor voltage. The standard pressure for the intake manifold should be 3.6 ± 0.3 V (100 ± 10 kPa (1 ± 0.1 kgf/cm2) [14 ± 1.4 psi]). If the voltage reading is outside of this range, it indicates a problem with the sensor.

    👉 If the error code is resolved, good.
    Otherwise, proceed to the next inspection step below.
    ⬇️⬇️⬇️

    8). Intake Temperature Sensor Inspection

    The Intake Temperature Sensor plays a crucial role in providing the engine control module (ECM) with real-time information about the temperature of the air entering the engine. Based on this information, the ECM can adjust the air-fuel mixture to ensure efficient combustion, which in turn reduces emissions and improves fuel economy.

    If the Intake Temperature Sensor is defective or fails, the ECM may not receive accurate information about the temperature of the intake air, which can lead to poor engine performance, increased emissions, and reduced fuel efficiency. As a result, it is important to identify and resolve any issues with the sensor promptly.

    An error code is triggered when the ECM detects a voltage signal outside of the expected range from the Intake Temperature Sensor.

    To diagnose the issue, the Intake Temperature Sensor voltage should be inspected using a voltmeter. The standard readings for the THA (Intake Air Temperature Sensor) voltage are:

    THA2.4 ± 0.6 V (20 ± 10°C)
    0.55 ± 0.15 V (80 ± 10°C) (reference value)

    If the voltage readings are outside of the expected range, it may indicate a problem with the Intake Temperature Sensor or the wiring connected to it. It is recommended to consult with a qualified technician to diagnose and repair the issue.

    👉 If the error code is resolved, good.
    Otherwise, proceed to the next inspection step below.
    ⬇️⬇️⬇️

    9). Coolant Temperature Sensor Inspection

    The Coolant Temperature Sensor is responsible for monitoring the temperature of the coolant in the engine. And sends this information to the engine control module (ECM), which uses it to adjust the air/fuel ratio and other engine parameters. The error code will be triggered if the coolant temperature sensor is malfunctioning or sending inaccurate signals. 

    To diagnose the problem, a technician can perform a voltage inspection of the coolant temperature sensor. This involves starting the engine and allowing it to warm up completely, then measuring the voltage output of the sensor using an I/O monitor. The standard readings for the sensor should be:

    THW0.55 ± 0.15 V (80 ± 10°C)
    2.4 ± 0.6 V (20 ± 10°C) (reference value)

    👉 If the error code is resolved, good.
    Otherwise, proceed to the next inspection step below.
    ⬇️⬇️⬇️

    10). Harness Continuity and Short Circuit Inspection

    The harness plays an important role in the operation of the forklift, as it connects the electrical components of the vehicle. If the harness is damaged or has a short circuit, it can cause the forklift to malfunction or display an error code.

    To diagnose a harness defect, the harness continuity and short circuit inspection procedure may be followed. This involves checking the wiring for any breaks, damage, or other issues that could interrupt the flow of electrical current. If any problems are found, the wiring may need to be repaired or replaced to resolve the issue.

    The standard readings for different connectors should be:

    A35-20 ~ C1-3Continuity
    A35-21 ~ C1-4Continuity
    A35-20 ~ FrameNo Continuity

    👉 If the error code is resolved, good.
    Otherwise, proceed to the next inspection step below.
    ⬇️⬇️⬇️

    11). O2 Sensor Inspection for Connector Contact Defect

    The O2 sensor voltage inspection is a diagnostic procedure used to determine if the oxygen (O2) sensor in a Toyota forklift is functioning correctly. The O2 sensor measures the amount of oxygen in the exhaust gas to help the engine control system adjust the air/fuel mixture for optimal combustion.

    The connector connection plays a crucial role in transmitting the voltage signal from the O2 sensor to the engine control module. If the connector is faulty, it can interfere with the voltage signal and cause the engine control system to receive incorrect readings.

    1. To inspect the O2 sensor voltage output, start by connecting A35 and C1.
    2. Then, start the engine and let it warm up completely.
    3. Set the direction to neutral and fully press the accelerator pedal.
    4. Measure the O2 sensor voltage using the I/O monitor: OX.
    5. The Standard Voltage Readings should be: OX 0.4 V or less and 0.5 V or more alternately output.
    6. If the readings are outside of this range, then there may be a problem with the connectors that connect the O2 sensor to the ECM.

    👉 If the error code is resolved, good.
    Otherwise, proceed to the next inspection step below.
    ⬇️⬇️⬇️

    12). O2 Sensor Voltage Inspection for Engine Controller Defect

    If the connector contact is functioning properly, you can assess any defects in the engine controller by taking O2 sensor voltage readings. In the case of a Toyota forklift, an engine controller defect may trigger an error code, as it regulates the air-fuel mixture and monitors the O2 sensor’s output.

    An engine controller defect can result in the O2 sensor reading incorrect voltage levels, causing the check engine light to appear, and E01-1, E01-2, E01-3, or E01-4 codes to be generated.

    To inspect the output of an O2 sensor in a Toyota forklift for checking engine controller defect, you can follow these steps:

    1. Disconnect the C1 connector.
    2. Connect a voltmeter or an oscilloscope probe to pin A35 of the connector.
    3. Start the engine and let it warm up completely.
    4. Set the direction of the forklift in neutral.
    5. Fully open the accelerator pedal.
    6. Read the O2 sensor voltage on the voltmeter or oscilloscope.
    7. The standard voltage readings should be OX 0.2 V or less (I/O monitor: OX).

    Summary

    In conclusion, troubleshooting error codes E01-1, E01-2, E01-3, and E01-4 on a Toyota forklift can be challenging, but it is a manageable task. It can be done efficiently with a systematic approach.

    These error codes indicate a Fuel Feedback Control Abnormality, which can be easily resolved by identifying and fixing issues with the fuel delivery system.

    By following the steps outlined in this guide, you can identify and resolve a range of issues that could be causing these errors, including intake system defects, exhaust system defects, sensor defects, ignition defects, fuel system defects, harness defects, engine controller defects, and more.

    Remember to always prioritize safety and seek the help of a qualified technician if necessary.

    Checking The Hydraulic Fluid Level & Reading The Hydraulic Oil Dipstick On A Toyota Forklift

    Learning how to read Toyota Forklift hydraulic oil dipstick is an important skill for forklift operators. So as to ensure proper maintenance and performance of the machine. Understanding the readings on the forklift’s dipstick can help identify potential issues with the hydraulic system, such as low fluid levels or a hydraulic leak.

    How To Read Toyota Forklift Hydraulic Oil Dipstick?

    1). Park the forklift on level ground. The operator should park the forklift on a level surface to ensure the even distribution of hydraulic oil in the tank.

    2). Lower the forks and the lift cylinders to the ground. Ensure that the forks and the lift cylinders are lowered to the ground and in a level position. When the forks and lift cylinders are elevated or tilted, it will cause some of the hydraulic fluid to be in the lift cylinders. And you won’t get an accurate reading.

    3). Set the parking brake. To prevent the forklift from moving, set the parking brake.

    4). Turn off the engine. Switch off the engine and wait for 5 to 10 minutes to allow all the hydraulic fluid to be pushed back into the reservoir. This will ensure that you get an accurate reading.

    5). Remove the cap from the forklift hydraulic fluid reservoir. If you’re unsure of the dipstick’s location, refer to the owner’s manual to locate the hydraulic tank. Most Toyota Forklift models have the hydraulic fluid reservoir located near the battery.

    6). Pull out the dipstick and wipe it clean. Pull out the dipstick, wipe it clean with a clean rag, and ensure it’s dry before reinserting it.

    7). Reinsert the dipstick and remove it again to check the oil level. Insert the dipstick fully and remove it again to check the oil level. The dipstick has markings on it (usually notched, dimpled, scribed, or numbered) indicating the acceptable range for the hydraulic oil level.

    8). Check the oil level. The optimal hydraulic fluid level is between the ‘Medium’ to ‘High’ marks. If the oil level is above the ‘high’ mark, it may result in leakage or spills when the engine is hot and running. If the oil level is below the ‘low’ mark, it may impact the forklift’s lifting and steering abilities.

    Toyota Forklift parked on a flat ground for hydraulic oil measurement reading
    An image of a Toyota forklift parked on a level ground with its lift cylinders lowered, as the operator takes a hydraulic oil measurement reading.

    Types Of Dipsticks Found In Toyota Forklifts

    Toyota Forklift models use several types of dipsticks. Some common types of dipsticks include:

    Flexible dipstick: This type of dipstick is made of a flexible material, such as plastic or rubber, and is commonly used in newer models. It may have numbered markings on it to indicate the oil level.

    Hydraulic oil dipstick with flexible plastic design and clear readings. 50 indicates low oil, while 70 marks the optimal oil level.

    Steel rod dipstick: This type of dipstick is made of a steel rod and is commonly used in older models. It may also have numbered or dotted markings on it to indicate the oil level.

    A steel hydraulic oil dipstick with clear readings for precise hydraulic oil measurements.

    Electronic dipstick: This type of dipstick is used in modern variants and does not require manual checking. It uses sensors to measure the oil level and displays it on the vehicle’s dashboard.

    Regardless of the type of dipstick used, the most important thing to focus on is the high and low marks on the dipstick. These marks indicate the minimum and maximum levels of the fluid. And should be used as a guide to ensure that the fluid is at the appropriate level.

    In the case of the Toyota Forklift, the hydraulic fluid level should be at or near the high mark to ensure the proper functioning of the hydraulic system. The hydraulic system includes components such as the hydraulic pump, cylinders, and hoses, which are responsible for lifting and moving loads. Maintaining the proper hydraulic fluid level is essential for the safe and efficient operation of the forklift.

    Locating The Hydraulic Oil Dipstick On Your Toyota Forklift

    The location of the hydraulic oil dipstick on a Toyota forklift varies depending on the forklift model. However, there are some common areas to look for the dipstick, which include:

    • Behind the operator’s seat
    • On the side of the forklift mast
    • On the hydraulic fluid reservoir

    If you’re having trouble locating the hydraulic oil dipstick, you can refer to your forklift’s user manual for guidance. The manual will provide detailed instructions on where to find the dipstick and how to read it.

    Tips For Finding The Dipstick In Hard-to-Reach Areas

    Some forklift models have hydraulic oil dipsticks in hard-to-reach areas, making it challenging to check the hydraulic oil level. If you’re having trouble finding the dipstick, here are some tips that can help:

    • Use a flashlight to spot the dipstick. This can help you locate the dipstick in dimly lit areas or areas with poor visibility.
    • If the dipstick is still challenging to find, you can use a mirror to see the reflection. This can help you locate the dipstick even if it’s in a tight or hard-to-reach area.
    • If you’re still having trouble finding the dipstick, seek help from a forklift technician. A technician will have the necessary tools and expertise to locate the dipstick quickly and efficiently.

    Understanding The Importance of Hydraulic Oil In A Toyota Forklift

    The hydraulic oil in a forklift serves multiple functions, including lubricating moving parts, transferring power, and reducing heat buildup. Without it, the forklift wouldn’t be able to perform its primary functions, which include lifting and transporting heavy loads. Therefore, it’s essential to keep the hydraulic oil at the optimal level and quality.

    Functions Of Hydraulic Oil In A Forklift

    The hydraulic oil in a forklift is a critical component that performs several essential functions.

    One of the primary functions of hydraulic oil is to lubricate the moving parts of the forklift. This lubrication helps to reduce friction between the parts, which can cause wear and tear over time.

    Additionally, hydraulic oil helps to transfer energy from one area to another, which is crucial for the forklift’s operation.

    The hydraulic oil also helps to cool the system parts, preventing overheating, and reducing the risk of breakdowns.

    Finally, hydraulic oil helps to prevent rusting of metal parts, which can occur due to exposure to moisture.

    It is important to note that the hydraulic oil’s quality and level play a critical role in the forklift’s performance. If the hydraulic oil level is low or the oil is contaminated, it can cause significant problems that can lead to breakdowns and increased maintenance costs.

    Toyota Forklift
    The hydraulic oil in a forklift serves multiple functions, including lubricating moving parts, transferring power, and reducing heat buildup.

    Signs Of Low Or Contaminated Hydraulic Oil

    It’s essential to pay attention to the signs that indicate low or contaminated hydraulic oil in a forklift. Here are some of the most common signs:

    • Difficulty in lifting or lowering loads: If you notice that the forklift is struggling to lift or lower loads, it could be a sign of low or contaminated hydraulic oil. This issue can cause the forklift to work harder, leading to premature wear and tear on the parts.
    • Unusual noises from the hydraulic system: Unusual noises, such as grinding or whining, can be a sign of low or contaminated hydraulic oil. If left unaddressed, this issue can cause damage to the hydraulic system.
    • Unusual increase in temperature: If you notice that the forklift’s temperature is rising unusually, it could be a sign of low or contaminated hydraulic oil. Overheating can cause significant damage to the forklift’s engine and other parts.
    • Slow movement of the hydraulic cylinder: If the hydraulic cylinder is moving slowly, it could be a sign of low or contaminated hydraulic oil. This issue can cause the forklift to work harder, leading to premature wear and tear on the parts.
    • Irregular pressure through the hydraulic system: If you notice that the pressure through the hydraulic system is irregular, it could be a sign of low or contaminated hydraulic oil. This issue can cause the forklift to work harder, leading to premature wear and tear on the parts.

    It’s important to address these signs as soon as possible to prevent further damage to the forklift. Regular maintenance and inspection of the hydraulic oil can help prevent these issues from occurring.

    Recommended Hydraulic Oil Change Intervals

    Toyota, a major forklift manufacturer, recommends that the hydraulic oil be replaced every 6 months or after 1,000 hours of use to ensure the hydraulic system’s proper functioning. This regular maintenance can help to prevent costly breakdowns and ensure that the forklift remains safe to operate. It is the responsibility of the forklift operator to check the hydraulic fluid level during the pre-shift inspection and ensure that it is at the appropriate level.

    FAQs

    How To Prepare A Forklift For An Accurate Hydraulic Oil Reading?

    To prepare a forklift for an accurate reading of the hydraulic oil dipstick:

    1. First, park the forklift on level ground.
    2. Lower the forks and the lift cylinders to the ground and ensure they are in a level position, as elevated or tilted forks and cylinders can result in inaccurate readings.
    3. Turn off the forklift engine and allow the hydraulic system to cool down for approximately ten minutes. This allows the hydraulic oil to settle at the correct level and temperature for an accurate reading. Avoid checking the dipstick immediately after turning off the engine, as the oil level may appear higher due to oil still circulating in the system.

    What To Do If Your Hydraulic Oil Level Is Too Low?

    If your hydraulic oil level is too low, you need to top it up slowly until it reaches the ‘Full’ mark. It’s important to use the correct type of hydraulic oil recommended by the forklift manufacturer to avoid damaging the hydraulic system. Before adding the hydraulic oil, ensure that the forklift is on level ground and the engine is turned off. Once the hydraulic oil level is optimal, start the forklift and let it operate for a few minutes to ensure it’s working correctly. 

    It’s also essential to check for any leaks that may have caused the hydraulic oil level to drop. Leaks can occur due to damaged hoses, seals, or fittings. If you notice any leaks, it’s crucial to have them repaired promptly to avoid further damage to the hydraulic system.

    What to Do If Your Hydraulic Oil Level Is Too High?

    If your hydraulic oil level is too high, you need to drain out some of the oil until it reaches the optimal level. Overfilling the hydraulic oil system can cause leaks and damage the hydraulic system’s components. It’s important to use a clean container to collect the excess hydraulic oil and dispose of it properly.

    Overfilling can also cause foaming, which can lead to air entering the hydraulic system. Air in the hydraulic system can cause cavitation, which can damage the hydraulic pump and other components. If you notice any foaming, it’s essential to drain out the excess hydraulic oil and refill it to the optimal level.