Category Archives: Errors

100-4 Error Code (SPN 100 / FMI 4) Troubleshooting Guide

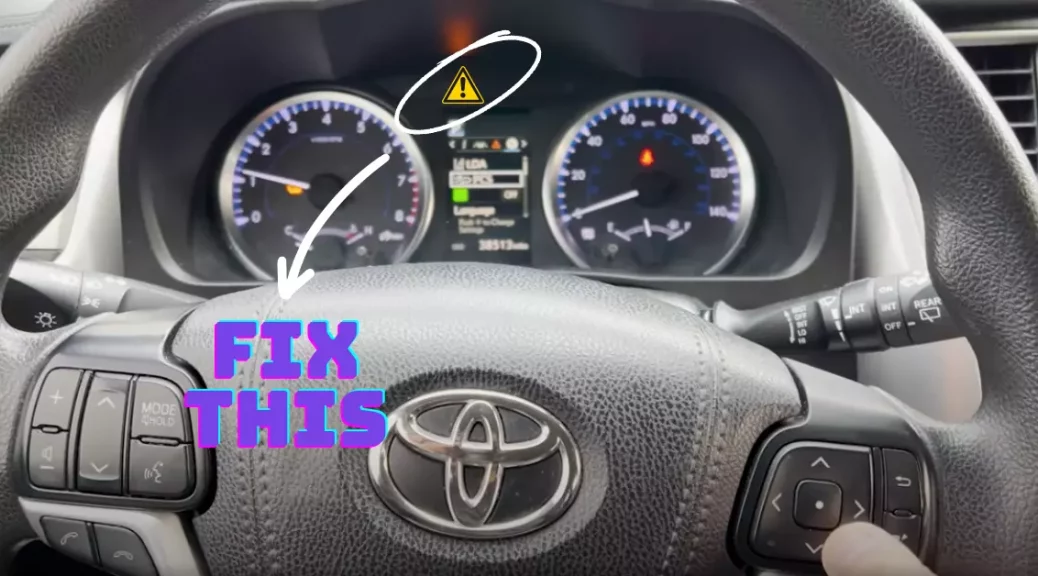
The error code 100-4 tends to pop up on big commercial trucks and industrial vehicles like forklifts. You might see it as SPN 100/FMI 4 on your Cummins’ display. Or error code 100-4 blinking on your Yale or Hyster forklift. Either way, it’s pointing to an issue with oil pressure. Specifically, low oil pressure in the engine.

So if you see that 100-4, it means the oil isn’t flowing strongly enough to properly lubricate all the moving parts under the hood. When the oil pressure drops, the oil can’t do its job keeping the pistons, valves, and bearings happily sliding and turning. The engine strains and struggles, and over time the damage builds up.

The code 100-4 illuminates to warn the driver there’s a problem that needs addressing fast. If left unfixed, the consequences can be dire — busted gaskets, seized pistons, worn out bearings, and sometimes complete engine breakdown. But with prompt troubleshooting, the root cause can be found and resolved before costly repairs are needed.

The good news is this post will provide a complete troubleshooting guide for fault code 100-4. I’ll walk you through how to track down the root cause and get that oil flowing safely again.

SPN 100 FMI 4 Error Code
SPN 100 / FMI 4 error code, also known as 100-4 fault code, displayed on vehicle’s dashboard.

Why & When 100-4 Fault Code Shows Up In Your Vehicle?

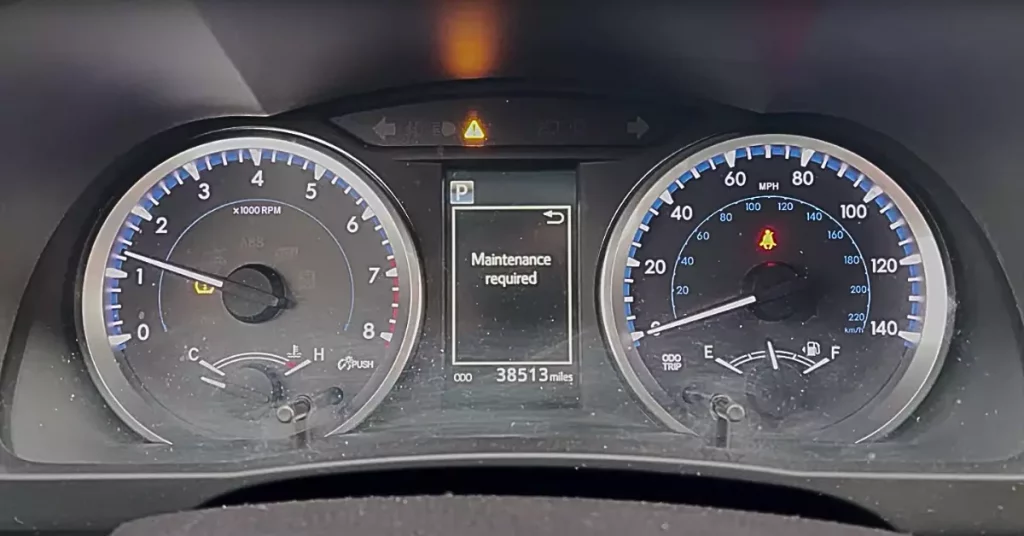
The 100-4 or SPN 100/FMI 4 error message pops up on the dashboard display when the engine’s electronic control unit (ECU) senses low oil pressure. The ECU is the electronic brain monitoring all aspects of engine operation, so it takes oil pressure very seriously. If the oil pressure drops too low, there will be a lack of oil circulation to keep the engine lubricated. This might cause grinding of the engine parts and excessive wear and tear to them.

When the ECU detects the oil pressure has fallen below the normal range, it will trigger the 100-4 code to appear on your dashboard display to warn you there’s a problem. At this point, the lack of oil flow is not good for your engine and continued driving could cause permanent damage.

There are a few possible causes for low oil pressure that would lead to this code appearing. It could be a faulty oil pressure sensor or wiring, a short in the sensor circuit, or the oil pressure sensor itself going bad.

💡 Error Code 100-4 (SPN 100 / FMI 4) vs Error Code 100-3 (SPN 100 / FMI 3)

Error code 100-4, also referred to as SPN 100 / FMI 4, indicates a situation of low oil pressure in the forklift or the truck’s engine.

On the other hand, error code 100-3, also known as SPN 100 / FMI 4, signifies high oil pressure in the forklift or the truck’s engine.

Both error codes share a common characteristic in that they identify abnormalities in the oil pressure of the vehicle’s engine. However, they differ in terms of the specific issue they highlight. Error code 100-4 targets low oil pressure, while error code 100-3 targets high oil pressure.

The diagnostic and troubleshooting process is consistent for both fault codes. In the case of 100-4, verify that your forklift engine’s oil pressure falls within the standard range. For 100-3, ensure the oil pressure isn’t higher than the standard range.

Possible Causes

There are five possible reasons why the error code 100-4 may show up on your Cummins, Detroit Diesel, or Yale equipment. I’ll explain each of these potential issues in detail below:

1). Faulty Engine Harness Connecting the Oil Pressure Sensor

The engine harness connecting the oil pressure sensor could be the reason behind error code 100-4. It is possible that the connector has pushed back or expanded pins, bent or broken pins, or corroded pins. These issues can disrupt the connection between the sensor and the engine harness, causing the error code to appear.

2). Moisture in or on the Connector

Another potential cause of error code 100-4 is moisture in or on the connectors connecting to the oil pressure sensor. Moisture can interfere with the electrical signals being transmitted through the connector, leading to an erroneous reading from the oil pressure sensor. This can trigger the error code and indicate a problem with the engine harness.

3). Missing or Damaged Seals

Missing or damaged seals in the oil sensor’s harness can also contribute to error code 100-4. Seals are crucial for maintaining a proper connection and preventing moisture or other contaminants from entering the connector. If these seals are missing or damaged, it can compromise the integrity of the connection and trigger the error code.

4). Low Engine Oil

The ‘100-4’ fault code could also be triggered due to low oil levels in your vehicle’s engine. Oil’s what keeps your engine’s insides running smooth, and without enough of it, you’ll grind those parts to dust in no time.

Now oil levels drop for a couple reasons. Maybe you’ve sprung a leak somewhere, in which case you’ll want to get under there and find it quick before you’re bone dry. But more often it’s just that you’ve gone too long between oil changes, or burned some off driving too hard. Whatever the case, best check your levels pronto.

Checking your oil isn’t a complicated thing. Pop the hood, locate the dipstick – that’s the handle with the yellow top that says ‘oil’ on it. Pull it out, wipe it clean, slide it back in, then pull it out again. Check the markings on the end of the stick, see where the oil line is. If it’s low, time to add a quart or three.

Now, if that dipstick showed your oil was low, here’s what you do. Make sure you’ve got the right oil for your engine – check the manual if you’re unsure. Unscrew the oil fill cap and top it off a quarter quart at a time, rechecking the dipstick as you go. Keep adding small amounts until the level reads full. Replace the fill cap when you’re done.

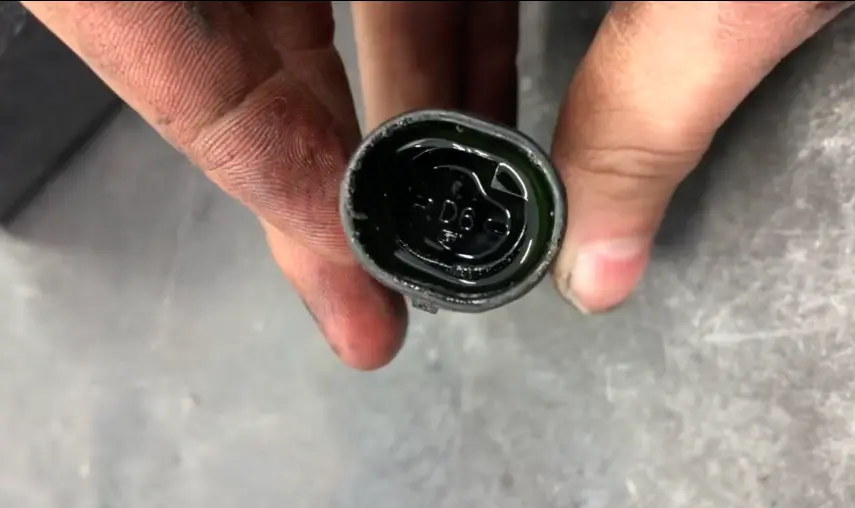
5). Faulty Oil Pressure Sensor

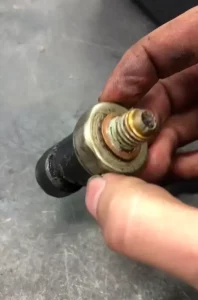
The oil pressure sensor is usually a little metal cylinder with some wiring attached. It’s mounted somewhere on your engine block, immersed in the oil flow. When the oil is pumping strong and true, that sensor remains content and quiet. But if it detects oil pressure dropping too low, it hollers for help by triggering the SPN 100/FMI 4 code.

To check if your oil pressure sensor has gone faulty, first look for any visible damage to it. See if the wiring is frayed or disconnected, or if the sensor body itself is cracked or broken. You can also get a mechanical oil pressure gauge and compare the sensor’s reading to the gauge’s — if they differ by a fair amount, the sensor probably needs replacement.

Oil Pressure Sensor 100-4 Error fault code path selection
Fault Code 100-4 path on a Cummins truck.

Troubleshooting Guide

Troubleshooting error code 100-4 requires a thoughtful, step-by-step approach. We must not rush to complex diagnoses before testing the basics. Methodical troubleshooting reveals the root cause.

➜ Typically we’d start by checking the open circuit. Verify all connectors fit snug and no wires look damaged. Wiggle things around while watching for intermittent power loss. That sort of thing. Just common sense open circuit testing.

➜ Next we inspect the engine oil pressure sensor wiring. Unplug the sensor and check the harness and pins for corrosion or loose/broken connections. Ohm out the wires checking for shorts to ground or power. Replace damaged wires if needed. You get the idea – standard wiring diagnostics.

➜ Finally we test the oil pressure sensor itself. If no wiring faults appeared in the last step, replace the suspect sensor, clear any codes, and retest for proper operation. The new sensor should fix it if the wiring checks out.

Here’s a complete step-by-step troubleshooting guide for error code 100-4 or SPN 100/FMI4:

Step #1 – Inspecting the oil pressure switch and engine harness connector pins.

Turn the key switch OFF and disconnect the engine harness from the oil pressure switch. Inspect the oil pressure switch and the engine harness connector pins for the following:

  • Pushed back or expanded pins
  • Bent or broken pins
  • Corroded pins
  • Moisture in or on the connector
  • Missing or damaged seals
Are the pins damaged?
If not, go to the next step.If yes, repair or replace the oil pressure switch or the engine harness, whichever has damaged pins

Step #2 – Inspecting the engine harness and ECM connector pins.

Turn the key switch OFF and disconnect the engine harness from the ECM. Inspect the engine harness and the ECM connector pins for the following:

  • Pushed back or expanded pins
  • Bent or broken pins
  • Corroded pins
  • Moisture in or on the connector
  • Missing or damaged seals
Are the pins damaged?
If not, go to the next step.If yes, repair or replace the engine harness or ECM, whichever has damaged pins.

Step #3 – Inspecting an open circuit.

Turn the key switch OFF and disconnect the engine harness from the oil pressure switch. Disconnect the engine harness from the ECM.

Check for an open circuit. Measure the resistance from pin of the engine harness connector to the oil pressure switch connector.

Are the ohms within the standard range?
If yes, go to the next step.If not, replace the engine harness.

Step #4 – Inspecting a circuit to ground.

Turn the key switch OFF and disconnect the engine harness from the oil pressure switch. Disconnect the engine harness from the ECM.

Check for a short circuit to ground. Measure the resistance from the pin of the engine harness connector to engine block ground.

Are the ohms within the standard range?
If yes, go to the next step.If not, replace the engine harness.

Step #5 – Inspect for a short circuit from pin to pin.

Turn the key switch OFF and disconnect the engine harness from the ECM. Disconnect the engine harness from the oil pressure switch.

Check for a short circuit from pin to pin. Measure the resistance from the pin of the engine harness connector to all other pins in the engine harness connector.

Are the ohms within the standard range?
If yes, replace the oil pressure sensor.If not, replace the engine harness.

🚜 How to Find the Correct Pin to Measure Resistance?

Determining the correct pin to measure resistance in an engine harness can vary depending on the specific vehicle or equipment model. However, there are general steps you can follow to identify the correct pin:

1. Consult the Service Manual: The most reliable method is to refer to the service manual of the specific forklift or truck model you’re working on. The manual typically includes a wiring diagram that indicates the pin numbers and their functions.


2. Trace the Circuit: If you don’t have access to the service manual, you can trace the circuit from the oil pressure switch back to the engine harness connector. This may help you identify which pin corresponds to the oil pressure switch.


3. Use a Multimeter: Set your multimeter to the resistance (ohms) setting and test each pin in the engine harness connector until you find the one that shows continuity with the oil pressure switch connector. This is the pin you would measure for resistance.


Resolving Fault Code 100-4 or SPN 100/FMI 4 in Trucks and Forklifts

Getting fault code 100-4 on your Cummins truck or Yale Forklift?

No worries, we can figure this out. There’s a process to follow with a few key steps that should get us to the bottom of it.

Let me share the diagnosis steps so you know how to resolve this error code.

Fix #1: Do the cables connecting to the oil pressure sensor appear to be in good shape?

As an experienced mechanic, I always start by checking the connectors and wiring harness leading to the oil pressure sensor.

The oil pressure sensor’s wiring harness and connectors play a pivotal role in the accurate transmission of electrical signals and power to and from the oil pressure sensor.

Inside these connectors or switches attached to the oil pressure sensor are little metal pins that carry signals from the oil pressure sensor back to the forklift’s electronic control unit (ECU). The ECU processes these signals to monitor and adjust the forklift’s performance in real-time.

If a pin is bent or broken, it may still make contact but could deliver intermittent signals, leading to fluctuating readings that do not represent the actual oil pressure.

This causes the ECU to register an abnormal oil pressure error due to the lack of data.

So the first step when it comes to troubleshooting fault code 100-4 is to turn the key switch OFF and disconnect the engine harness from the oil pressure switch. And then Inspect the oil pressure switch and the engine harness connector pins for the following:

Bent or Broken Pins: Connector pins on the oil pressure sensor’s harness are responsible for transmitting electrical signals from the sensor to the ECU. Bent or broken pins can disrupt this signal, leading to inaccurate oil pressure readings. This can cause the ECU to misinterpret the oil pressure, potentially resulting in improper engine adjustments or a failure to alert when oil pressure is out of the normal range.

Pushed Back or Expanded Pins: If the pins are pushed back or expanded, they may not make proper contact with the corresponding receptacles in the connector. This can lead to intermittent or weak signals, causing fluctuating oil pressure readings that confuse the ECU and lead to erratic engine behavior.

Corroded Pins: Corrosion on the pins can be caused by exposure to moisture or chemicals, leading to increased electrical resistance. High resistance can weaken the signal from the sensor, causing the ECU to receive incorrect information about the engine’s oil pressure.

Moisture in or on the Connector: Moisture can cause short-circuits or corrosion, both of which can interfere with the electrical signals passing through the connector. This can result in the ECU receiving no signal or a faulty signal, which may trigger an oil pressure error.

Fix #2: Is there trouble with the EOP sensor circuit?

The error code 100-4 on a forklift means there’s trouble with the Engine Oil Pressure (EOP) sensor circuit.

When the oil pressure sensor circuit has an electrical short to ground, it sets off this code.

This circuit relays the oil pressure from the engine to the computer, so the computer knows if there’s enough juice lubricating all those churning parts. Oil pressure is key because without enough of it, the engine can’t lubricate itself properly. Parts grind and overheat.

Now a short to ground means somewhere along that wire path electricity is leaking straight to the body of the forklift rather than following the route to the computer. Could be a fray in the wires, the sensor itself gone kaput, or a loose connection letting the current sneak away.

When the oil pressure sensor circuit is short to ground, the sensor can send the wrong signals to the forklift’s computer. The computer might think there’s too little oil pressure when there’s really enough. Or it may get no signal at all.

If the forklift’s computer gets the wrong oil pressure readings, the engine won’t run right. The computer may think the oil pressure is too low to operate safely. So the engine could run rough or even shut off to avoid damage.

The fix here is to track down the short circuit. Check connections are tight, wires intact, and the sensor itself is in working order. The computer needs good intel to manage the engine properly. Once you get that oil pressure data flowing right again, the computer can relax and let the engine run as it should.

Fix #3: Has the voltage from the engine oil pressure switch dropped below the acceptable threshold?

Fault code 100-4 also means that the voltage from the engine oil pressure sensor has dipped below the acceptable threshold.

In simpler terms, the forklift’s ECU has detected that the voltage signal received from the engine oil pressure sensor is too low, which suggests that the oil pressure within the engine might be insufficient.

But why does this voltage system exist?

Well, it serves as a crucial monitoring mechanism to ensure that the engine oil pressure remains within the acceptable range. By measuring the voltage, the forklift can identify any potential issues with the engine’s oil pressure.

Typically, for most forklift models, the voltage range lies between 4.5 and 5.5 volts.

Talking in the context of the engine oil pressure’s voltage issue, the error code 100-4 could arise due to several reasons:

Firstly, the oil pressure sensor itself might be malfunctioning or have completely failed, resulting in the transmission of an incorrect low voltage signal. Additionally, there could be problems with the wiring connected to the oil pressure sensor, such as a short circuit or disconnection, causing a disruption in the voltage signal.

However, it is also essential to recognize that the engine could genuinely be experiencing low oil pressure. This can stem from various factors, including a low oil level, worn engine components, or even a faulty oil pump.

In some cases, the forklift may even enter a “limp mode,” where its performance is restricted to prevent any further damage. This serves as a protective measure, ensuring that the forklift is not operated under unfavorable conditions, which could lead to severe engine damage.

Therefore, it becomes imperative to address the issue promptly to prevent any further damage.

Fix #4: Are there any missing or damaged seals on the switch or harness?

Error code 100-4 on a forklift can be attributed to the absence or deterioration of seals within the oil pressure switch or the harness. When those seals start leaking or go missing, the oil doesn’t build up the pressure it needs, and the engine doesn’t get the oil it’s hankering for.

Without that oil pressure, your forklift’s engine can overheat right quick. The pistons and valves don’t get the lubrication they need and end up scraping themselves raw. It’s a sorry state of affairs, to be sure. Those seals and the harness are there to make sure the oil flows smooth and steady, keeping your engine running cool and clean.

There are several factors that can contribute to the damage or loss of these seals. For instance, regular wear and tear over time can cause deterioration, especially if the forklift is subject to demanding working conditions or insufficient maintenance. Additionally, accidental impact or mishandling during maintenance procedures can result in the seals becoming damaged or displaced.

The fix is simple. Replace those worn out seals with new ones, make sure they’re seated properly. Then that forklift will run clean as a whistle. Engine will fire right up, oil will flow smooth as silk, and voltage will be steady as the forklift goes!

Fix #5: Could the oil pressure sensor be malfunctioning?

The 100-4 fault code can also come up when there’s an issue with the oil pressure sensor in the engine. In most forklifts, the oil pressure switch sits on the engine block, typically below and to the right of the electronic control module. There are a few ways to check if the oil pressure sensor is working properly or not:

➜ A failing oil pressure sensor can make the engine noisy or the timing chain rattle. You’ll hear a low, metallic rattling from the engine, especially if the timing chain is fed oil and the tensioners lose pressure. The bad sensor isn’t detecting the oil pressure dropping, so the engine sounds off. The most surefire way is to manually check the oil pressure with a gauge. If the gauge shows good oil pressure but the dash light is on, it’s probably a bad sensor. 

➜ Sometimes a faulty oil pressure sensor leaks oil too, which you’ll spot around where the sensor sits. Oil can seep past the sensor’s bad seal, dripping onto the engine. A failing sensor may get oil on its body, a sign it’s leaking.

➜ Look for corrosion or damage on the sensor or its plug. Exposure to the elements in the engine bay can corrode the sensor, and physical harm can also cause issues.

Leakage in the oil pressure sensor
Sometimes a faulty oil pressure sensor has oil leakage inside and outside.

⛽ How To Check If The Oil Pressure Sensor Needs Replacement?

To check if your oil pressure switch has gone south, you’ll want to get your hands on an oil pressure testing kit.

Once you have the necessary tools for the job, start by locating the oil pressure switch, usually found on the engine block.

Loosen the switch, being careful not to strip the threads, then install the oil pressure testing gauge in its place.

Start up your forklift to circulate the oil, and check the reading on your gauge.

If it’s lower than the specification in your owner’s manual, you likely have a short circuit or a faulty harness. However, if the pressure is normal, you have a bad oil pressure switch and simply need to replace it to get back to work.

Conclusion

In conclusion, resolving the error code 100-4 in your forklift or truck is not always a straightforward fix. And often, it requires a bit of detective work to pinpoint the exact cause. Whether it’s a faulty harness, short-circuited wires, or an issue with the oil pressure sensor itself, each scenario demands a careful approach.

For some, the resolution might be as simple as replacing a worn-out harness that has seen better days. For others, it could involve tracing and repairing short circuits that are causing havoc in the electrical system. And then there are times when the oil pressure sensor is the culprit.

How did you resolve the fault code 100-4? Was it a matter of swapping out the harness, or did you find yourself untangling a web of electrical shorts? Or perhaps it was the oil pressure sensor that needed your attention. Share your experiences and solutions in the comments below.

Master Warning Light On Nissan – Causes & Fixes

Out of all the warning lights you may see on your Nissan’s dashboard, the master warning light is usually not something to be desperate about. Firstly, it may not be a fault at all, but a condition, such as an open door. More importantly, the car will often display a supplemental message with the details of the error. In this article, we’ll take a look at the different variants of the Nissan master warning light, its causes, and the fixes of this orange triangle with an exclamation point in Nissan cars.

Nissan Master Warning Light Symbol

Nissan car owners will recognize the master warning light by its triangular shape, with an exclamation mark in the center. The master warning light should illuminate in combination with other lights that point to an issue on a specific system, or show up with an explanation message.

Master Warning Light on Nissan Car

There are several colors in which warning lights display on Nissan, with the most important ones being:

  • Red: These lights should get your attention and typically need to be addressed immediately: however, some of them don’t indicate a fault, but a condition, such as the parking brake is applied.
  • Yellow: Usually indicates faults on systems such as the ABS, parking brake, powertrain, or low tire pressure, among other conditions.
  • Other: A green, blue, or white symbol light indicates that a given system is on (for example, high beam assist or fog lights).

The master warning light usually shows up in a red or yellow triangle with an exclamation point in Nissan cars. The cause and meaning of the warning light vary based on its color. The causes will vary from model to model and on different generations; consult your owner’s manual for info specific to your model.

Causes For The Master Warning Light On Nissan – Red

An image of a yellow-colored triangle with an exclamation mark, known as the Master Warning Light, illuminated on a Nissan Rogue due to an engine malfunction.

A red master warning light on Nissan may indicate some of the following:

  • An engaged parking brake
  • A warning from the transmission system
  • Steering wheel hands-on detection warning
  • An open door
  • On some electric Nissan cars, in case of a DC/DC converter issue, together with the battery warning light

The following steps may help with the listed issues:

  • Check whether the parking brake is engaged. Release the parking brake before driving. If the light is on while the parking brake is disengaged, check for issues with the parking brake.
  • Check the current position of the shifter. If the car is parked, engage the parking brake. Check for issues in the transmission system.
  • Don’t take your hands off the steering wheel while driving! If the Steering Assist is faulty, it should automatically turn off. If there’s a fault with the steering assistance or any of its functions, have your car checked.
  • Latch all doors before driving.
  • Don’t drive if there is a battery warning while the car is running – it means that your battery is discharging. Have your car checked by a qualified electrician.

Causes For The Master Warning Light On Nissan – Yellow

Yellow triangle master warning light is illuminated on the Nissan Qashqai Tekna, indicating the need for servicing of the e-power system.

While yellow warning lights typically aren’t as alarming as red ones, they shouldn’t be ignored. Possible causes include:

  • A low fuel level
  • No keys detected
  • Low windshield washer fluid level
  • A loose fuel cap
  • Low tire pressure
  • Open trunk
  • An open door (when stopped)
  • 4WD error, on models that have 4WD

The troubleshooting for most of these causes is simple:

  • Top up fuel levels.
  • Make sure the keys are not too far away from the car. If the car still doesn’t detect the keys, there may be an issue with the key or within the car.
  • Top up windshield washer fluid.
  • Screw the fuel cap on correctly after refueling.
  • Inflate the tires up to the recommended pressure.
  • Latch the trunk and all the doors before driving.
  • The 4WD has many components which could be at fault, from any of the sensors to the control unit– consult a trusted repair shop.

Meaning of Exclamation Point Inside of a Triangle In Different Nissan Vehicles

The red or yellow triangle with an exclamation point serves as a common indicator across all Nissan vehicles.

Here are some likely causes you should watch out for in various Nissan models:

Nissan Altima

A loose fuel cap is a common cause of this occurrence. Another common reason is leaving the headlights on when exiting the vehicle. Make sure the headlights are off after leaving the vehicle, as they can drain the battery over time.

Nissan Rogue

The master warning light in Nissan Rogue is typically triggered by two main issues: power steering problems and overheating within the AWD system.

Nissan Qashqai

The triangle malfunction light in Nissan Qashqai usually indicates that the fuel level is nearing empty. Also, a convenient feature of the Qashqai is that it accompanies the triangle symbol in conjunction with an error message in the message center, providing clear and concise information about the issue at hand.

Nissan Sentra

The warning malfunction indicator light commonly activates when Sentra is low on gas or has a missing or improperly tightened fuel cap.

Nissan Pathfinder

The exclamation point inside of a triangle in Nissan Pathfinder usually means there is an overheated all-wheel drive system.

A picture depicting the Master Warning Light illuminated inside a Nissan vehicle that was recently brought to my workshop for inspection. The reason behind the warning light being activated is attributed to issues within both the engine (see the check engine light on the tachometer) and the Forward Emergency Braking system (see the Forward Collision Warning Light on the speedometer).

Nissan Murano

The triangle warning dashboard light serves as a broad indicator that something requires attention or troubleshooting in the Murano.

Nissan Kicks

The blinking master warning light indicates an emissions control malfunction. This means a problem or issue with the components responsible for managing and reducing harmful exhaust emissions in the Nissan Kicks.

Nissan Maxima

The exclamation point symbol typically indicates low tire pressure.

Nissan 370z

Nissan 370Z is a sporty and performance-oriented car model known for its power and handling capabilities.

In Nissan 370Z, the master warning light illuminates due to:

➜ No key warning: Indicates that the key is not detected or is not within the range for starting the vehicle.

➜ Low fuel warning: Alerts the driver that the fuel level is running low and requires refueling.

➜ Low washer fluid warning: This indicates that the windshield washer fluid level is low and needs to be replenished.

➜ Parking brake release warning: Reminds the driver to release the parking brake before driving.

➜ Door/rear hatch open warning: Notifies the driver if any of the doors or the rear hatch is open, ensuring they are closed properly for safe operation.

FAQs

What To Do When The Master Warning Light Comes On In Your Nissan Vehicle?

Your course of action depends on the cause. After checking all the essentials, such as the doors and the trunk, and making sure there is enough fuel, the warning should be gone, and you can drive on as usual.

However, if the warning shows up with another error light that indicates a deeper issue, it’s best to get your car diagnosed and repaired by a professional. Some issues, like a burst tire, may make it unsafe to keep driving; in that case, stop at a safe place as soon as you can.

How to Perform A Nissan Master Warning Light Reset?

The Nissan master warning light should never be manually reset without prior diagnostics. It’s because it is designed to alert the driver to potential issues with their vehicle.

If the error causing the warning light is not resolved and you manually reset the light, it will temporarily turn off but will activate again once the engine detects the same issue.

To reset the Nissan master warning light, you can use any compatible diagnostic software; for a simple reset, a simpler, universal tool should also work. Only erase DTCs after the issue has been resolved.

If you decide to reset the car by disconnecting the battery terminal, keep in mind that this may also undo your clock settings, and infotainment system settings, and, in older vehicles, it may reset the fuel trip as well. Therefore, be prepared to reconfigure these settings after the reset.

Can the Master Warning Light Reset Itself?

Typically, the master warning light will automatically reset only when the underlying issue that triggered the light has been resolved.

However, sometimes a “history” DTC will be left after the underlying cause is resolved. These DTCs indicate a fault that is not present at the moment, and once erased, the light will go off.

Conclusion

There isn’t one definitive reason the master warning light illuminates in Nissan cars. And this triangle with an exclamation point inside is usually accompanied by further warning lights and/or display info. The two variants, red and yellow, differ in meaning and severity. The causes for the triangle light range from something as simple as a loose fuel cap to more complex issues that require a professional inspection.

Brake Override Malfunction: What It Is, How To Solve (The Complete Guide)

The “Brake Override Malfunction” is a rare issue that can occur in your vehicle, but it is easily manageable and can be resolved without causing any inconvenience or danger.

When this error appears on your car’s dashboard, it may catch your attention, but with proper guidance, it can be fixed quickly, allowing you to continue with your daily routine without any disruption, whether it’s leaving for work in the morning or embarking on a trip.

The symptoms associated with this issue are minor and can be quickly resolved with the help of a diagnostic software tool.

Despite its intimidating name, brake override malfunction is not a major issue, and there are only a few reasons why it may occur, most of which are relatively easy to fix and don’t require any expensive parts.

In this article, we’ll delve into the various causes of this issue and provide simple solutions to each one.

What Does The Brake Override Malfunction Mean?

Brake Override Malfunction
A Brake Override Malfunction error is displayed on a car’s dash.

A brake override malfunction occurs in a vehicle’s electronic control system, where the software that controls the brakes and accelerator becomes confused and fails to respond to the driver’s acceleration input.

In most cases where you see this error, there actually is a fault that’s causing the car to think that someone’s tampering with the gas and brake pedals. Some very common causes for this include a blown fuse or a broken brake pedal switch, though there are more subtle ones.

The Brake Override Malfunction is also called the “Brake and Race Pedal” error because it is sometimes identified by the brake and race pedal symbols on the dashboard of the vehicle.

How Does Brake Overriding Work?

Your brake override system is in place to protect you from improper pedal use and prevent potential malfunctions and accidents caused by it.

If you, for whatever reason, voluntarily or involuntarily press the brake and the acceleration pedals at the same time (maybe in a frantic attempt to slow down the car,) the sensors will notice unusual behavior and put brake override into effect.

The brake override tries to clear the confusion by doing the thing that’s usually safer: instead of uncontrollably speeding up, it will slow the car down. It’s worth noting you can turn the brake override off, but it’s not recommended to do this if you haven’t fixed the underlying cause!

What Causes The Brake Override Error + How To Fix

Here are some of the most common causes that may give you a hint of what to check if you have this error:

A Blown Brake System Fuse

This is an extremely common issue, and thankfully, it’s also easy to solve. A fuse blows when there is a current overload in a circuit, protecting the components from damage and/or fire. The fuse can blow as a one-time event if an unusual event happens, but if it keeps happening, it’s likely there’s an underlying electrical issue.

You can usually find fuses in fuseboxes near or under the steering wheel, around the glovebox, under the hood, next to the battery, and/or in the rear. Check the fuses using a probe, and always replace them only with a working fuse of the same marking, never higher!

A Faulty Brake Pedal Switch

Another one of the more frequent causes is a faulty brake pedal switch (or the brake pedal positions sensor), which can trick your car into thinking the brake pedal is depressed when it is not. This piece of electronics is usually a simple microswitch that activates once you press the brake pedal and lets the car know you’re acting on the brake pedal.

In this case, you should check the wiring leading to the sensor and replace the switch if there seems to be a problem with it. The sensor is usually located under the dash, near the pedal itself.

A Faulty Airbag Module

You might be confused at first, thinking, what does the airbag module have to do with the brakes? It’s simple: the brake system and the airbag system both have a safety role, and they communicate with each other.

So, if a fault occurs in your brakes and leads to a brake override, the airbag may shut down too. You may notice this in the form of an airbag warning light and on newer cars a warning message in addition to the light.

Before replacing the module, make sure that it’s not a sensor or the wiring that’s causing the issue. It’s also best not to tamper with the airbag unless you’re a professional, as accidentally triggering an airbag not only damages the car but can also cause severe injuries. Even worse, you don’t want the airbags to not deploy in the case of a crash!

Issues With The ABS Module

The ABS module is the main control unit for the brakes, and if it fails, it’s possible you’ll get a brake override warning. While this is less common than a brake switch fail or a blown fuse, it can still happen, even in newer cars.

Replacing the ABS control unit can be costly, depending on the vehicle, so do check with your local service about the price.

Other Issues

There is a multitude of other potential issues that can cause a brake override error. Worth mentioning are: 

  • Corroded, broken, or incorrect wiring
  • Tameping with the braking or any related system
  • Replacing brake lights or rewiring them incorrectly
  • A weak battery in the key fob

You can only get a more precise clue about the issue after checking with a diagnostic tool. It’s time-consuming and unnecessarily painful to try to blindly guess what’s the issue. If it’s more than just a blown fuse and you don’t have the appropriate tools, it’s best to send your car to a car shop.

Brake Override Malfunction Error Resetting Guide

Blinking Brake Override Malfunction error message.

If you encounter a brake override malfunction error on your car, there is a universal temporary solution that may help you get back on the road until you can take your vehicle to a mechanic. It’s important to note that while this method should work on most vehicles, there may be different methods for different cars.

Here are the steps you can take to reset the brake override malfunction error:

  1. Disconnect the battery terminals, starting with the negative terminal first and then the positive.
  2. Connect the two cables to each other and hold them in place for 15 minutes. This will not affect anything in the car since the battery power has not been connected.
  3. With the cables still connected, turn the headlights knob in your car to full. This will drain all the electrical power from your car, which will reset all of its electronic systems.
  4. After 15 minutes, plug the cables back into the battery, starting with the positive first and then the negative.
  5. Once the battery terminals are well connected, start your car and the brake override malfunction error should be gone.

Keep in mind that this is only a temporary or emergency solution, and you should take your car to a mechanic as soon as possible. Additionally, this may not be a permanent fix, so it’s best to get your car checked out by a professional.

Can You Drive With Brake Override Malfunction?

In some cases, you’ll still be able to control the car, while in others you might not be able to change gears and drive at all. In either case, a brake override malfunction is a failure of a crucial safety system of your car, so it’s best to get it checked and fixed as soon as possible.

For a short period of time, you can ignore the brake override issue and turn the system off. The procedure for this differs from car to car, so you’ll have to find the exact procedure in the owner’s manual. You should only do this so that you can get your car to the repairer.

Conclusion

A brake override malfunction is a safety issue, but it’s usually not a difficult fix. The telltale sign is a dashboard warning, while other symptoms can include a malfunctioning gearbox, airbag, and brake system.

If the fuses and the key fob battery are ok, there’s not much you can do without professional equipment, and you should get your car checked since driving with a brake issue can be dangerous.

How To Turn Off Master Triangle Warning Light On Toyota Highlander

Many cars have something similar to the master warning icon present on Toyota models, including the Highlander. It usually looks like a yellow or orange triangle with an exclamation mark in the center.

The master warning light can have many meanings, from an open door to a maintenance reminder to a fault in your powertrain, and it usually lights up in combination with other warning lights. Those other lights can point in the direction of the underlying issue, such as the engine. Turning off the master warning light means targeting the underlying issues.

What do the different combinations of sound and flashing that come on with your master warning light mean? How can you turn it off? What steps should you take if you see this warning on your Highlander? We’ll answer all these questions and more in the following article.

What Does The Triangle Master Warning Light On Toyota Highlander Mean?

To figure out what the master warning icon means on your Toyota Highlander, you’ll have to see what exactly it’s signaling. The 2019 Toyota Highlander owner’s manual explains the warning light:

“A buzzer sounds and the warning light comes on and flashes to indicate that the master warning system has detected a malfunction.”

The buzzer and the warning light, in turn, are also accompanied by a warning message on the multi-information display, where you should see more info about the exact issue.

Toyota Highlander Triangle Master Warning Light
The Master Warning Light on Toyota Highlander looks like a yellow or orange triangle with an exclamation mark in the center. It is accompanied by a warning message on the multi-information display.

The master warning system incorporates pretty much everything that may present a problem while driving, even if it’s not a fault on your car. The seriousness of the issue can vary as well. While some issues can be fixed on the spot, others will require either an immediate or a non-urgent inspection.

How Do I Turn The Master Warning Light Off On Toyota Highlander?

To turn off the master warning light on your Toyota Highlander, it’s important to diagnose the underlying issue. Or simply cleaning the DTC or resetting the service due.

To identify the cause of the warning light, you can use the steering wheel controls to cycle to the error in the alerts/warnings section of the menu bar. From there, you can scroll down to view the specific issue. If there are no alerts or warnings, then everything is likely fine and you can proceed to reset the warning light.

The blinking triangle exclamation mark on Toyota Highlander’s dashboard is a Master Warning Light.

Here’s how to reset the master warning light on a Toyota Highlander:

  1. Press the return key on the steering wheel.
  2. Press the menu key.
  3. Use the side arrow key to navigate to the ‘wheel’ icon on the screen.
  4. Scroll down the wheel icon category until you find the ‘scheduled maintenance’ option.
  5. Press enter.
  6. A pop-up will appear asking whether to reset data, choose ‘Yes’.
  7. Your maintenance light will be reset, and the orange/yellow triangle exclamation mark will turn off.

Causes And Fixes

If the master warning light is illuminated and toggling over it displays alerts or warnings, then immediate attention is required. The cause of the warning could be as minor as an open door, an unbuckled seatbelt, irregular tire pressure, or even low windshield washer fluid. However, in certain Toyota Highland models, the master warning light may also be accompanied by other dashboard lights, particularly if the issue is more severe, such as an EPS or braking malfunction.

The possible causes of the master warning light turning on in the Toyota Highlander are explained below:

1. Door, Hood, Back Door, Or Glass Hatch Open

Maybe it’s simply the case that you didn’t properly latch any of the doors or the hood. The warning pops up once your vehicle reaches a speed of above 3 mph, as the car assumes you started driving.

Check if everything has clicked and if the doors aren’t sticking out. Perhaps there is an obstacle such as leaves or dust, so ensure all the latches are clean. If that does not help, it may mean there is a mechanical or electrical issue with the door latch.

2. Inaccurate Tire Pressure

Irregular tire pressure is a common cause of the master warning light coming on, especially in colder climates.

Extremely high temperatures can lead to a significant increase in tire pressure, while extremely low ones have the opposite effect. Incorrect tire pressure can lead to lower fuel efficiency, reduced handling, and increased wear on the tires.

To prevent this from happening, it is important to check your tire pressure regularly and ensure that it is at the recommended level. In the case of a Toyota Highlander, the recommended tire pressure is 36 psi for both the front and rear tires. This ensures that the tires provide optimal performance and durability, while also ensuring a safe and comfortable ride.

3. An Issue In The EPS (Electric Power Steering)

The EPS makes the steering wheel less heavy by measuring how much you turn the steering wheel and sending the appropriate amount of force to the wheels. It’s logical that when the EPS fails, steering will become more difficult.

In this case, you will also see an EPS warning on the dash, which looks like a steering wheel with an exclamation mark right off it. You should get your car checked and fixed.

4. Radar, Blind Spot Monitor, Or Park Assist Issue

The warning for the radar cruise control may be due to bad weather, or because there is dirt obstructing the sensor. In the second case, you’ll have to clean the sensor and everything should start working normally.

The Blind Spot Monitor (BSM) and the Park Assist can also report an error and stop working if they are covered with ice, mud, snow, etc. If this does not help, there may be an underlying issue, like a misaligned BSM sensor or any type of fault with the intuitive parking sensors.

5. Abnormal Engine Oil Pressure

If the engine oil pressure is too low, the multi-information display will tell you to stop your vehicle in a safe place.

There are plenty of reasons for low engine oil pressure, such as low levels of oil, a wrong choice of oil, or an oil pump failure. Continuing your ride when this warning shows up means there’s a chance you’ll do great damage to your engine. Therefore, you should stop safely and get the car serviced.

6. Braking Malfunction

A malfunction in the car’s brakes, whether mechanical, hydraulic, electric, or electronic, can trigger the master warning icon and buzzer. Driving with this error can be dangerous, so you need to fix it as soon as you can.

In this case, you’ll see a brake warning light beside the master icon. Causes for a brake issue can vary, but you most likely won’t be able to fix any without equipment, parts, and knowledge of the brake system.

7. Maintenance Due

Every couple thousand miles, your Highlander will remind you to perform routine maintenance. While this is not urgent, you shouldn’t wait forever before performing maintenance or having it done at a service.

After finishing the maintenance, the warning won’t go away on its own. You’ll have to reset it, which can be done using the trip meter button in the following manner:

  1. Turn the engine switch to off/lock with the trip meter A shown (depending on whether you have a smart key or not).
  2. While holding down the trip reset button, switch to ON, but don’t start the engine.
  3. Hold the button until you see the trip meter displaying zeros.

You can also reset the maintenance due using the multi-information display:

  1. With the engine on, press the gear icon.
  2. Select “Maintenance System”
  3. Select “Yes”
  4. The display should show “Initialization Completed.”

This is the procedure for a 2019 Toyota Highlander model, and the exact steps may be slightly different in an older or newer Highlander. You can find the manual for your manufacturing year on Toyota’s website.

What To Do If The Toyota Highlander Triangle Warning Light Turns On?

Depending on the cause of your master warning light, these are the steps you should take:

  • If the cause is not a fault, in other words just a warning, take the appropriate action. Check that all doors, the hood, the back door, the glass hatch, and the moon roof are closed and whether something prevents them from closing fully. Also, disengage the parking brake before driving.
  • There are some fixes you can perform yourself. If the car reports a dirty sensor, clean it from any ice, snow, or mud. If the maintenance has been performed, but not reset, initiate the reset.
  • If there is an underlying fault, you will need to send your car to the dealership. Some faults don’t require immediate assistance but still have to be checked, while others, such as issues with the brakes or engine oil, need to be addressed as soon as possible.

Assessing The Troubleshooting Urgency

When the Toyota Highlander’s master warning light illuminates in a flashing or non-flashing state accompanied by an audible alert, it signifies an urgent problem that requires immediate attention. This could be a malfunctioning driving system, such as the brake system. Or a potential danger that may arise if the corrective procedure is not promptly performed.

On the other hand, when the triangle with exclamation illuminates in a flashing or non-flashing state without an audible alert, it could indicate a possible malfunction in the electrical components or the need for routine vehicle maintenance. For instance, a dirty sensor, a malfunctioning airbag system, or the necessity of tuning for optimal performance.

Conclusion

The triangle master warning light itself is vague, but it usually shows up with a message that explains the issue, and sometimes another warning, such as a “check engine” or brake warning.

If there are no obvious driving hazards like an unlatched door or driving with the parking brake applied, the light may also show up because of maintenance due, to a dirty park assist or BSM sensor, or problems on the engine, brakes, or power steering.

Some of these causes can be easily solved yourself, but if there is a more serious issue, it’s best to see a Toyota car service or dealership.