Error codes E02-1 and E02-2 can disrupt Toyota forklift operations and lead to frustration. This post sheds light on these error codes and provides you with a practical approach to resolving them. Explore the resetting guide, troubleshooting tips, and essential knowledge to solve error codes 02-1 and 02-2 in the Toyota forklift.
Error Codes E02-1 and E02-2 on Toyota Forklift
Error codes 02-1 and 02-2 on a Toyota Forklift indicate an abnormality in the intake temperature sensor. In simpler terms, this means that there is an issue with the sensor responsible for measuring the temperature of the air going into the forklift’s engine.
When the intake temperature sensor malfunctions, it can have a noticeable impact on the Toyota forklift’s performance. The engine may experience difficulties in adjusting the air-to-fuel ratio, leading to suboptimal combustion and reduced power output. This can result in decreased acceleration, lower overall performance, and potentially even engine stalling or hesitation during operation.
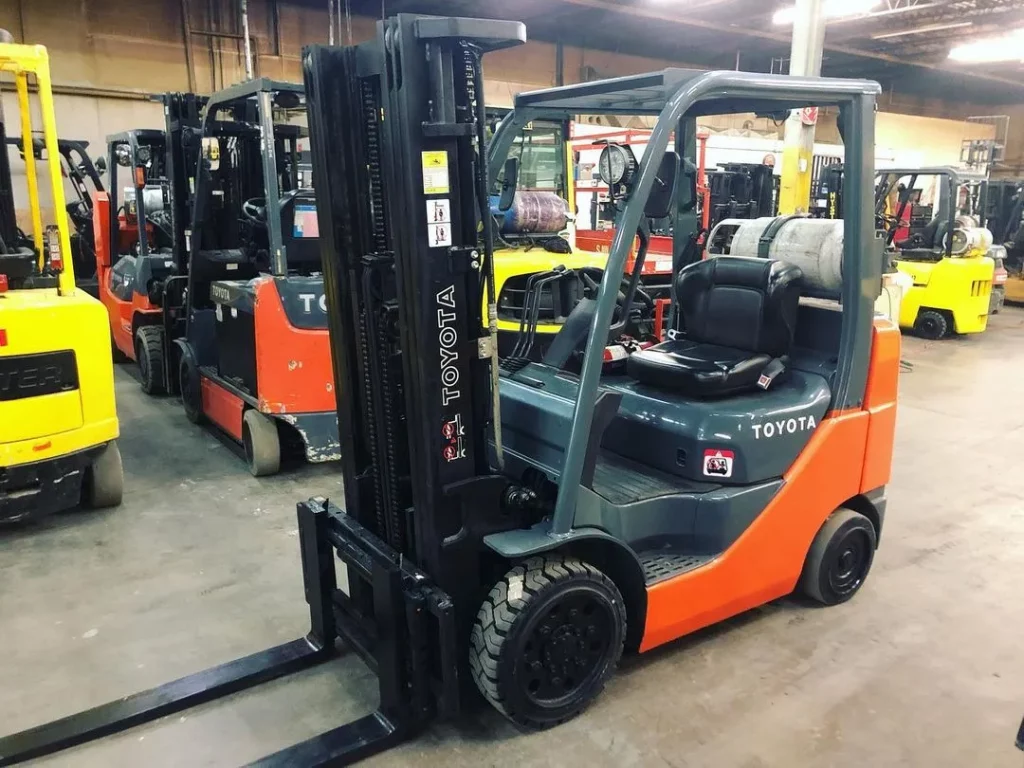
An illustration of the portion related to Toyota forklift error codes 02-1 and 02-2.
Several factors can contribute to the occurrence of 02-1 and 02-2 error codes. The most common causes include a defective intake temperature sensor itself, a faulty wiring harness connecting the sensor, or a defect in the engine controller responsible for interpreting sensor signals. Identifying and addressing these underlying issues is essential for solving the E02-1 and E02-2 fault codes in the Toyota forklift.
Probable Causes
There are three main causes of the E02-1 and E02-2 error messages on the Toyota forklift.
Intake temperature sensor defect
Harness defect
Engine controller defect
Resetting Guide
To reset error codes 02-1 and 02-2 on a Toyota forklift, follow these steps:
Disconnect the battery negative terminal and wait for more than 10 seconds.
Inspect and correct any disconnection or water entry issues in connectors C3 and AC2.
Reconnect all connectors, ensuring they are securely attached.
Reconnect the battery negative terminal.
Turn the ignition key switch to the ON position and start the engine.
Check whether the error codes have cleared.
If resetting successfully clears the error codes, it indicates a possible connector contact defect. To resolve this issue, thoroughly inspect the connectors, ensuring they are clean, free from corrosion, and making proper contact. Address any defects or connection issues, and then retest the forklift to ensure the error does not reappear.
However, if the error codes persist even after resetting, further troubleshooting is required. In such cases, it is recommended to inspect the intake temperature sensor and its harness for any defects, such as physical damage or loose connections. Additionally, check for short circuit continuity in the sensor and harness. Detailed instructions for troubleshooting these components can be found below.
Troubleshooting Guide
Resolving error codes 02-1 and 02-2 on a Toyota forklift requires a systematic inspection of the following components:
a). Intake Temperature Sensor Individual Inspection
The intake temperature sensor plays a crucial role in the forklift’s operation. It measures the temperature of the air being drawn into the engine, providing important data to the engine controller for optimizing fuel-air mixture and combustion. Incorrect readings from this sensor can trigger error codes and adversely affect the forklift’s performance.
To carry out the intake temperature sensor individual inspection, follow these steps:
1). Ensure the ignition key switch is in the OFF position.
2). Disconnect connector C3 and connect connector A35.
3). Using a multimeter, measure the resistance between terminals C3-1 and C3-2.
4). The readings should be approximately 2.45 ± 0.24 kilo-ohms at 20°C (room temperature) and 0.32 ± 0.03 kilo-ohms at 80°C (higher temperature).
C3-1 ~ C3-2
2.45 ± 0.24 kΩ (20°C)
0.32 ± 0.03 kΩ (80°C)
5). By checking these resistance values, you can determine if the intake temperature sensor is functioning correctly. Any significant deviation from the specified readings may indicate a defect in the sensor, requiring further investigation and potential replacement.
b). Harness Continuity and Short Circuit Inspection
The harness connects various components, including the sensor, to the engine controller. Any issues with the harness can disrupt the flow of electrical signals and trigger error codes 02-1 and 02-2.
To conduct the harness continuity and short circuit inspection, follow these steps:
1). Ensure the ignition key switch is in the OFF position.
2). Disconnect connectors A35 and C3.
3). Measure the continuity between terminal A35-29 and C3-2. There should be continuity, indicating a proper connection.
4). Measure the continuity between terminal A35-28 and C3-1. There should also be continuity between these terminals.
5). Measure the continuity between terminal A35-29 and the frame of the forklift. There should be no continuity, indicating no direct connection to the frame.
A35-29 ~ C3-2
Continuity
A35-28 ~ C3-1
Continuity
A35-29 ~ Frame
No continuity
6). By performing these continuity tests, you can verify that the harness is properly connected and not experiencing any short circuits. If any continuity or short circuit issues are detected, further inspection and potential repairs or replacements may be necessary to rectify the problem.
Summary
Error codes E02-1 and E02-2 indicate an issue with the intake temperature sensor of the Toyota forklift. These fault codes can arise from a defective sensor, a faulty wiring harness, or a malfunctioning engine controller. If resetting doesn’t clear the error, the troubleshooting includes inspecting the intake temperature sensor and its harness for defects and checking for short circuits.
Without resolving these errors, the engine may experience difficulties in adjusting the air-to-fuel ratio, leading to inefficient combustion. This can result in reduced power output, decreased acceleration, and overall lower performance of the forklift. In some cases, the engine may even stall or hesitate during operation, hindering productivity in a warehouse or industrial setting.
Toyota Forklift has a diagnostic system that can detect issues such as error code E01-5. This article discusses the E01-5 forklift fault code in detail, its resetting guide, and how to troubleshoot it.
Understanding this error code and its diagnosis will help keep the forklift running smoothly.
Error Code E01-5 on Toyota Forklift
Error Code E01-5 on Toyota Forklift indicates an O2 sensor open abnormality. This means that the oxygen sensor is not receiving the return signal from the computer, which can be caused by a harness defect (broken wire or dirty connectors), a failed O2 sensor, or a defective ECM.
When this error occurs, the engine speed can become unstable or it may even stop. This can limit the speed of traveling and materials handling due to limited engine power output.
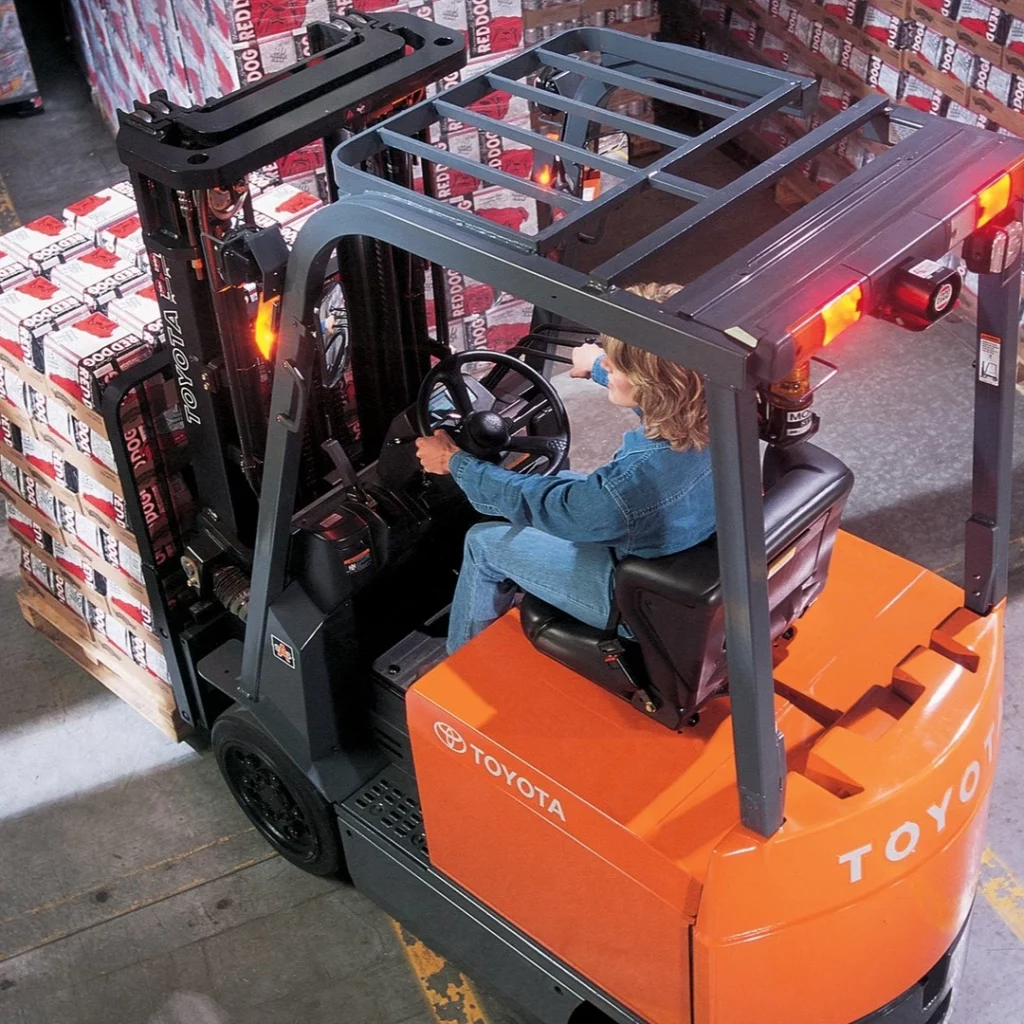
An illustration of the portion related to Toyota Forklift Error Code E01-5.
It is therefore important to ensure that the O2 sensor functions properly, to maintain the performance of the engine and keep its operator safe.
Probable Causes
There are 3 main possible causes of the E01-5 error message on the Toyota Forklift:
O2 Sensor defect
Harness defect
Engine controller defect
Resetting Guide
Resetting fault code E01-5 can often clear the issue. But if the error persists, it may indicate a faulty part or sensor that needs to be replaced. Here are the steps to reset the error code E01-5 on a Toyota Forklift:
Disconnect the negative terminal of the battery for more than 10 seconds.
Check the connection status of the C1 connector.
Disconnect C1 and perform a visual and contact pressure inspection of the connector.
Short circuit the service connector TC terminal with the E1 terminal.
Connect C1 and the battery negative terminal. Note: For combination vehicles, switch the fuel changeover switch to gasoline.
Turn the ignition key switch ON (engine stopped).
Depress the accelerator pedal 5 times fully (from fully open to fully closed) within 30 seconds.
Start the engine and check that the error has been cleared.
Disconnect the battery negative terminal again.
Disconnect the TC and E1 terminals.
Reconnect the battery negative terminal.
Start the engine and let it idle for a few minutes.
Fully depress the accelerator pedal for 3 minutes with the direction neutral. Then release and leave the accelerator pedal.
Run the engine at idle for 2 minutes.
Repeat steps (13) and (14) for 3 times.
Turn the ignition key switch OFF and leave it off for one minute.
Repeat steps (12 to 16) for 3 times.
This will clear the E01-5 fault code.
Troubleshooting Guide
Resetting the E01-5 error code on your Toyota Forklift is often the solution to the issue. In case resetting this code does not work, troubleshooting the issue can resolve the problem. To troubleshoot the problem, you should follow the inspection process in sequential order.
1). Connector Contact Inspection
The connector is a crucial component in a forklift’s electrical system that helps to establish a reliable connection between different parts of the system. It plays a critical role in ensuring that the various electrical signals are transmitted accurately and consistently, which is essential for the proper functioning of the forklift.
A defective Connector contact could result in triggering the e015-error code on Toyota Forklift. Its fix typically involves replacing the damaged component with a new one.
👉 If the error code is resolved, it’s good. Otherwise, move to the next inspection step below. ⬇️⬇️⬇️
2). Harness Continuity and Short Circuit Inspection
The harness continuity refers to the uninterrupted flow of electrical signals through the wiring harness of the forklift. To ensure proper forklift performance, it’s important to address any breakage or damage in the harness, which could result in issues such as the e01-5 error code.
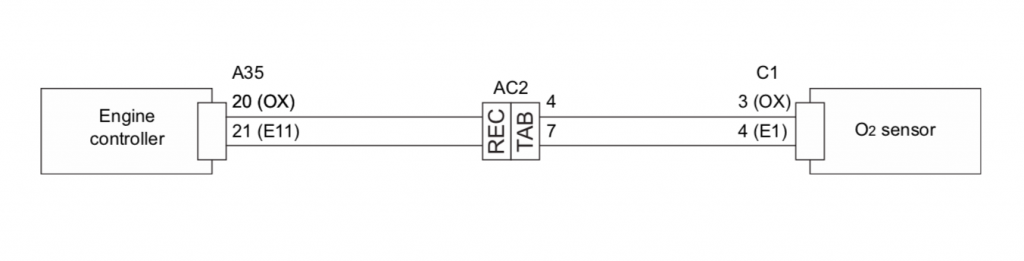
To inspect for continuity and short-circuiting of the harness, it is necessary to turn off the ignition key switch and disconnect the A35 and C1 connectors. This will allow for a thorough inspection of the wiring harness.
Standard readings are:
A35-20 ~ C1-3
Continuity
A35-21 ~ C1-4
Continuity
A35-20 ~ Frame
No Continuity
The fix would be to repair or replace the damaged harness to ensure the uninterrupted flow of electrical signals.
👉 If the error code is resolved, it’s good. Otherwise, move to the next inspection step below. ⬇️⬇️⬇️
3). O2 Sensor Inspection for Connector Contact Defect
The O2 sensor voltage inspection is a diagnostic procedure used to determine if the oxygen (O2) sensor in a Toyota forklift is functioning correctly.
The O2 sensor measures the amount of oxygen in the exhaust gas to help the engine control system adjust the air/fuel mixture for optimal combustion.
The connector connection plays a crucial role in transmitting the voltage signal from the O2 sensor to the engine control module. A faulty connector can cause voltage signal interference, leading to the engine control system receiving incorrect readings.
To inspect the O2 sensor voltage output, start by connecting A35 and C1.
Then, start the engine and let it warm up completely.
Set the direction to neutral and fully press the accelerator pedal.
Measure the O2 sensor voltage using the I/O monitor: OX.
The Standard Voltage Readings should be: OX 0.4 V or less and 0.5 V or more alternately output.
If the readings are outside of this range, then there may be a problem with the connectors that connect the O2 sensor to the ECM.
👉 If the error code is resolved, it’s good. Otherwise, move to the next inspection step below. ⬇️⬇️⬇️
4). O2 Sensor Voltage Inspection for Engine Controller Defect
If the connector contact is functioning properly, you can assess any defects in the engine controller by taking O2 sensor voltage readings.
In the case of a Toyota forklift, an engine controller defect may trigger an error code, as it regulates the air-fuel mixture and monitors the O2 sensor’s output.
An engine controller defect can cause the check engine light to appear, and E01-5 or E01-1 or E01-2 codes to be generated due to incorrect voltage levels in the O2 sensor readings.
To inspect the output of an O2 sensor in a Toyota forklift for checking engine controller defect, you can follow these steps:
Disconnect the C1 connector.
Connect a voltmeter or an oscilloscope probe to pin A35 of the connector.
Start the engine and let it warm up completely.
Set the direction of the forklift in neutral.
Fully open the accelerator pedal.
Read the O2 sensor voltage on the voltmeter or oscilloscope.
The standard voltage readings should be OX 0.2 V or less (I/O monitor: OX).
Summary
The Toyota Forklift’s E01-5 error code provides valuable information about the specific issue affecting the O2 sensor. By identifying an open abnormality in the sensor, the error code helps diagnose potential problems such as a faulty harness due to dirty connectors or broken wires, a malfunctioning O2 sensor, or a flawed ECM. This allows for targeted and effective troubleshooting to restore the forklift’s optimal functioning. While resetting the fault code may sometimes fix the problem, persistent occurrences may indicate the need to replace a defective part or sensor.
To identify the issue, the article recommends examining the connector contact, testing the harness for continuity and short-circuits, and inspecting the O2 sensor for connector contact issues. To ensure optimal performance, it is recommended to check the engine controller if the issue persists.
As a Toyota forklift operator or mechanic, you know that occasional errors are a natural part of the job. It’s worth noting that E01-1, E01-2, E01-3, and E01-4 are common errors that you might encounter, but they’re not insurmountable challenges. These Toyota forklift error codes can be a headache, but fortunately, with a little troubleshooting, you can have your Toyota forklift up and running in no time.
Fortunately, in this guide, we’ll examine these errors in detail, clarify their meanings, and provide guidance on how to reset them.
So, whether you’re a forklift operator or a mechanic who’s eager to master the troubleshooting process of E01-1, E01-2, E01-3, and E01-4 errors on Toyota forklifts, keep reading!
Errors E01-1, E01-2, E01-3, E01-4 on Toyota Forklift
The Toyota forklift’s E01-1, E01-2, E01-3, and E01-4 codes suggest issues with the fuel delivery system or Fuel Feedback Control Abnormalities, but they’re not problems without solutions. If the forklift is consuming rich gasoline, it could trigger E01-1, whereas using lean gasoline could result in E01-2. On the other hand, Toyota forklifts running on rich or lean LPG can experience E01-3 and E01-4, respectively.
An illustration of the portion related to Toyota Forklift Error Codes E01-1, 01-2, 01-3, 01-4
When the fuel feedback control system malfunctions, the engine may receive inaccurate information about the amount of fuel necessary to maintain a steady speed, leading to errors. This causes the Toyota forklift’s engine to stall or run erratically.
If you encounter these E01-1 to E01-4 error codes, it’s important to take action quickly to prevent further damage to your forklift and ensure that it’s safe to operate.
Probable Causes
Toyota forklift error codes E01-1, 01-2, 01-3, and E01-4 indicate one or more of the following different malfunctions.
Intake System Defect
Exhaust System Defect
Sensor Defect
Ignition Defect
Fuel System Defect
Harness Defect
Engine Controller Defect
Resetting Guide
Fortunately, resetting these codes can solve the issue. However, if the problem persists, it might indicate a faulty part or sensor that requires replacement. Here are the simple steps to reset error codes E01-1, E01-2, E01-3, or E01-4 on a Toyota Forklift:
Disconnect the negative terminal of the battery for more than 10 seconds.
Check the connection status of the C1 connector.
Disconnect C1 and perform a visual and contact pressure inspection of the connector.
Short circuit the service connector TC terminal with the E1 terminal.
Connect C1 and the battery negative terminal. Note: For combination vehicles, switch the fuel changeover switch to gasoline.
Turn the ignition key switch ON (engine stopped).
Depress the accelerator pedal 5 times fully (from fully open to fully closed) within 30 seconds.
Start the engine and check that the error has been cleared.
Disconnect the battery negative terminal again.
Disconnect the TC and E1 terminals.
Reconnect the battery negative terminal.
Start the engine and let it idle for a few minutes.
Fully depress the accelerator pedal for 3 minutes with the direction neutral. Then release and leave the accelerator pedal.
Run the engine at idle for 2 minutes.
Repeat steps (13) and (14) for 3 times.
Turn the ignition key switch OFF and leave it off for one minute.
Repeat steps (12 to 16) for 3 times.
This will reset the E01-1 or E01-2 on the Toyota Forklift.
Troubleshooting Guide
If for some reason the error code does not resolve by resetting it, don’t worry. You can move on to a more detailed troubleshooting process. This process involves inspecting different sensors and parts of the forklift to identify the root cause of the issue.
It is important to note that the inspection steps need to be followed in an accurate sequence to ensure that you do not miss any potential issues. Therefore, it is recommended that you start inspecting your Toyota forklift in the following sequence:
1). Air Intake Inspection
The method of troubleshooting starts with an air intake inspection. Simply start the forklift’s engine and check if there’s a presence of air being sucked in from the engine oil level gauge, oil filler cap, or PCV hose. As well as the connections between the air cleaner and the cylinder head.
Remember, there must be no air being sucked in as this can cause an imbalance in the air-fuel ratio, leading to an incorrect fuel feedback control. This can cause your Toyota forklift’s engine to misfire and result in the e01 error codes being triggered.
If air is being sucked into the system, the next step is to identify the source of the problem and make the necessary repairs. This may involve replacing damaged or worn components, such as hoses, seals, or gaskets, or cleaning or replacing the air filter.
👉 If the error code is resolved, good. Otherwise, proceed to the next inspection step below. ⬇️⬇️⬇️
2). Exhaust Gas Leakage Inspection
The Exhaust Gas Leakage Inspection is a diagnostic process that involves starting the engine and checking if there is any exhaust gas leakage from the exhaust system parts and connections between the cylinder head and the catalytic muffler.
Exhaust gas leaks can be prevented with proper maintenance and can help ensure optimal engine performance, improved fuel efficiency, and reduced emissions. In addition, taking steps to prevent exhaust leaks can also help protect the health and safety of operators and other personnel who may be exposed to toxic fumes.
👉 If the error code is resolved, good. Otherwise, proceed to the next inspection step below. ⬇️⬇️⬇️
3). Fuel Leakage Inspection
Regular maintenance can help prevent fuel leakage in forklifts and promote increased fuel efficiency, reliable engine performance, and decreased environmental pollution. Moreover, ensuring proper fuel system maintenance can help prevent workplace accidents and minimize the risk of fire hazards.
To troubleshoot Toyota Forklift errors between E01-1 and E01-4, the first step is to start the engine and visually inspect the fuel system parts and connections between the fuel pump and injectors for any signs of fuel leakage. If fuel is detected, it’s important to identify the source of the problem and fix it immediately to prevent further damage or safety risks.
👉 If the error code is resolved, good. Otherwise, proceed to the next inspection step below. ⬇️⬇️⬇️
Toyota Forklift error codes E01-1 and E01-2 can be useful indicators of potential fuel system issues. By identifying and addressing problems with components such as the pressure regulator, fuel filter, or fuel pump, forklift operators can help ensure optimal performance and efficiency.
Fixing pressure regulator defects can help promote proper fuel pressure and prevent performance issues while resolving fuel filter defects can help prevent blockages and maintain the fuel flow. Similarly, addressing fuel pump defects can help ensure proper fuel pressure, improve efficiency, and prevent other performance problems in forklifts.
To perform a fuel pressure inspection, you’ll need a fuel pressure gauge. First, locate the fuel pump and remove the fuel pressure regulator cap. Attach the fuel pressure gauge to the regulator cap, and then start the forklift to measure the pressure in the fuel system. You can then compare this reading to the manufacturer’s specifications to determine if the pressure is within the proper range.
If fuel pressure is too high, it can cause excessive fuel consumption, engine damage, and even fires. On the other hand, if fuel pressure is too low, it can cause poor engine performance, decreased fuel efficiency, and stalling.
👉 If the error code is resolved, good. Otherwise, proceed to the next inspection step below. ⬇️⬇️⬇️
OR
If the Toyota Forklift is running on LPG/CNG and is displaying error codes E01-3 or E01-4, it could indicate a regulator defect. In this case, the following steps can be taken to perform a regulator primary pressure inspection:
Allow the forklift to cool down by turning it off before starting the inspection.
Locate the pressure regulator on the fuel system.
Disconnect the fuel supply hose from the regulator inlet.
Attach a pressure gauge to the regulator inlet.
Turn on the forklift and let it idle.
Observe the pressure gauge reading and compare it to the manufacturer’s specifications.
If the pressure reading is within the acceptable range, the regulator’s primary pressure is functioning correctly. If not, the regulator may need to be replaced.
Reconnect the fuel supply hose to the regulator inlet and turn off the forklift.
👉 If the error code is resolved, good. Otherwise, proceed to the next inspection step below. ⬇️⬇️⬇️
5). Spark Plug Individual Inspection
The Toyota forklift’s spark plugs are responsible for igniting the fuel-air mixture in its combustion chamber. A well-maintained spark plug with sufficient gap enhances engine performance, preventing misfires.
To ensure the spark plugs are functioning properly, it is important to carry out a spark plug individual inspection. This involves inspecting the spark plug for any signs of wear or damage, such as cracks, carbon deposits, or corrosion. To ensure good engine performance, replace the spark plug if any warning signs appear.
To inspect the spark plugs of a Toyota forklift, follow these steps:
Turn off the engine and let it cool down.
Locate the spark plugs on the engine. The number of spark plugs will depend on the type of engine installed in the forklift.
Remove the spark plug wires or ignition coils to access the spark plugs.
Check the condition of the spark plugs for any signs of wear, damage, or fouling.
If the spark plugs are dirty, clean them with a wire brush or replace them if necessary.
Reconnect the spark plug wires or ignition coils.
Start the engine and ensure that it’s running smoothly without error codes.
👉 If the error code is resolved, good. Otherwise, proceed to the next inspection step below. ⬇️⬇️⬇️
6). Injector Individual Inspection
Injectors are critical components of the engine in a forklift and are responsible for delivering the precise amount of fuel to the engine cylinders.
When a Toyota forklift experiences an error code ranging from E01-1 to E01-4, it could mean that there is a problem with one or more of the injectors.
Inspecting the injectors individually involves removing each injector and checking its condition. Look for signs of wear and tear, damage, or clogging in the nozzle or spray tip. Also, inspect the fuel inlet and outlet ports for any obstructions or blockages. Ensure that the injectors are clean and that the spray pattern is uniform.
👉 If the error code is resolved, good. Otherwise, proceed to the next inspection step below. ⬇️⬇️⬇️
7). Intake Pipe Pressure Sensor Voltage Inspection
The intake pipe pressure sensor is an important component of the engine control system that measures the air pressure in the intake manifold. It provides feedback to the engine control unit (ECU) to adjust the air-fuel mixture and ensure optimal performance. The intake pipe pressure sensor can fail due to various reasons such as wear and tear, damage, or wiring issues. When the sensor fails, it can cause the ECU to receive incorrect data, resulting in the engine running rough and leading to the E01-2 or E01-3 error code.
To diagnose this issue, it is important to inspect the intake pipe pressure sensor voltage. The standard pressure for the intake manifold should be 3.6 ± 0.3 V (100 ± 10 kPa (1 ± 0.1 kgf/cm2) [14 ± 1.4 psi]). If the voltage reading is outside of this range, it indicates a problem with the sensor.
👉 If the error code is resolved, good. Otherwise, proceed to the next inspection step below. ⬇️⬇️⬇️
8). Intake Temperature Sensor Inspection
The Intake Temperature Sensor plays a crucial role in providing the engine control module (ECM) with real-time information about the temperature of the air entering the engine. Based on this information, the ECM can adjust the air-fuel mixture to ensure efficient combustion, which in turn reduces emissions and improves fuel economy.
If the Intake Temperature Sensor is defective or fails, the ECM may not receive accurate information about the temperature of the intake air, which can lead to poor engine performance, increased emissions, and reduced fuel efficiency. As a result, it is important to identify and resolve any issues with the sensor promptly.
An error code is triggered when the ECM detects a voltage signal outside of the expected range from the Intake Temperature Sensor.
To diagnose the issue, the Intake Temperature Sensor voltage should be inspected using a voltmeter. The standard readings for the THA (Intake Air Temperature Sensor) voltage are:
THA
2.4 ± 0.6 V (20 ± 10°C)
0.55 ± 0.15 V (80 ± 10°C) (reference value)
If the voltage readings are outside of the expected range, it may indicate a problem with the Intake Temperature Sensor or the wiring connected to it. It is recommended to consult with a qualified technician to diagnose and repair the issue.
👉 If the error code is resolved, good. Otherwise, proceed to the next inspection step below. ⬇️⬇️⬇️
9). Coolant Temperature Sensor Inspection
The Coolant Temperature Sensor is responsible for monitoring the temperature of the coolant in the engine. And sends this information to the engine control module (ECM), which uses it to adjust the air/fuel ratio and other engine parameters. The error code will be triggered if the coolant temperature sensor is malfunctioning or sending inaccurate signals.
To diagnose the problem, a technician can perform a voltage inspection of the coolant temperature sensor. This involves starting the engine and allowing it to warm up completely, then measuring the voltage output of the sensor using an I/O monitor. The standard readings for the sensor should be:
THW
0.55 ± 0.15 V (80 ± 10°C)
2.4 ± 0.6 V (20 ± 10°C) (reference value)
👉 If the error code is resolved, good. Otherwise, proceed to the next inspection step below. ⬇️⬇️⬇️
10). Harness Continuity and Short Circuit Inspection
The harness plays an important role in the operation of the forklift, as it connects the electrical components of the vehicle. If the harness is damaged or has a short circuit, it can cause the forklift to malfunction or display an error code.
To diagnose a harness defect, the harness continuity and short circuit inspection procedure may be followed. This involves checking the wiring for any breaks, damage, or other issues that could interrupt the flow of electrical current. If any problems are found, the wiring may need to be repaired or replaced to resolve the issue.
The standard readings for different connectors should be:
A35-20 ~ C1-3
Continuity
A35-21 ~ C1-4
Continuity
A35-20 ~ Frame
No Continuity
👉 If the error code is resolved, good. Otherwise, proceed to the next inspection step below. ⬇️⬇️⬇️
11). O2 Sensor Inspection for Connector Contact Defect
The O2 sensor voltage inspection is a diagnostic procedure used to determine if the oxygen (O2) sensor in a Toyota forklift is functioning correctly. The O2 sensor measures the amount of oxygen in the exhaust gas to help the engine control system adjust the air/fuel mixture for optimal combustion.
The connector connection plays a crucial role in transmitting the voltage signal from the O2 sensor to the engine control module. If the connector is faulty, it can interfere with the voltage signal and cause the engine control system to receive incorrect readings.
To inspect the O2 sensor voltage output, start by connecting A35 and C1.
Then, start the engine and let it warm up completely.
Set the direction to neutral and fully press the accelerator pedal.
Measure the O2 sensor voltage using the I/O monitor: OX.
The Standard Voltage Readings should be: OX 0.4 V or less and 0.5 V or more alternately output.
If the readings are outside of this range, then there may be a problem with the connectors that connect the O2 sensor to the ECM.
👉 If the error code is resolved, good. Otherwise, proceed to the next inspection step below. ⬇️⬇️⬇️
12). O2 Sensor Voltage Inspection for Engine Controller Defect
If the connector contact is functioning properly, you can assess any defects in the engine controller by taking O2 sensor voltage readings. In the case of a Toyota forklift, an engine controller defect may trigger an error code, as it regulates the air-fuel mixture and monitors the O2 sensor’s output.
An engine controller defect can result in the O2 sensor reading incorrect voltage levels, causing the check engine light to appear, and E01-1, E01-2, E01-3, or E01-4 codes to be generated.
To inspect the output of an O2 sensor in a Toyota forklift for checking engine controller defect, you can follow these steps:
Disconnect the C1 connector.
Connect a voltmeter or an oscilloscope probe to pin A35 of the connector.
Start the engine and let it warm up completely.
Set the direction of the forklift in neutral.
Fully open the accelerator pedal.
Read the O2 sensor voltage on the voltmeter or oscilloscope.
The standard voltage readings should be OX 0.2 V or less (I/O monitor: OX).
Summary
In conclusion, troubleshooting error codes E01-1, E01-2, E01-3, and E01-4 on a Toyota forklift can be challenging, but it is a manageable task. It can be done efficiently with a systematic approach.
These error codes indicate a Fuel Feedback Control Abnormality, which can be easily resolved by identifying and fixing issues with the fuel delivery system.
By following the steps outlined in this guide, you can identify and resolve a range of issues that could be causing these errors, including intake system defects, exhaust system defects, sensor defects, ignition defects, fuel system defects, harness defects, engine controller defects, and more.
Remember to always prioritize safety and seek the help of a qualified technician if necessary.
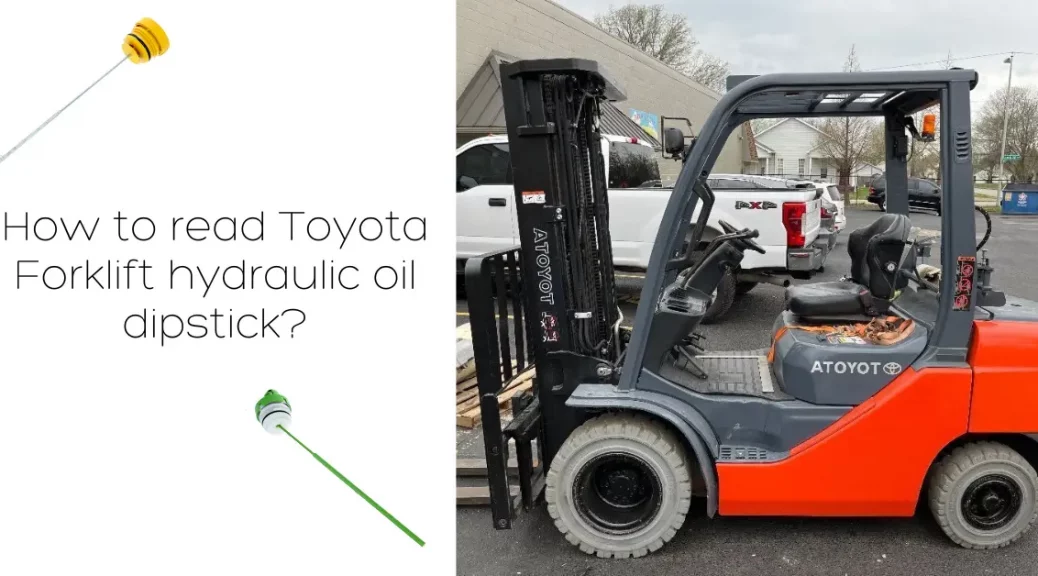
Learning how to read Toyota Forklift hydraulic oil dipstick is an important skill for forklift operators. So as to ensure proper maintenance and performance of the machine. Understanding the readings on the forklift’s dipstick can help identify potential issues with the hydraulic system, such as low fluid levels or a hydraulic leak.
How To Read Toyota Forklift Hydraulic Oil Dipstick?
1). Park the forklift on level ground. The operator should park the forklift on a level surface to ensure the even distribution of hydraulic oil in the tank.
2). Lower the forks and the lift cylinders to the ground. Ensure that the forks and the lift cylinders are lowered to the ground and in a level position. When the forks and lift cylinders are elevated or tilted, it will cause some of the hydraulic fluid to be in the lift cylinders. And you won’t get an accurate reading.
3). Set the parking brake. To prevent the forklift from moving, set the parking brake.
4). Turn off the engine. Switch off the engine and wait for 5 to 10 minutes to allow all the hydraulic fluid to be pushed back into the reservoir. This will ensure that you get an accurate reading.
5). Remove the cap from the forklift hydraulic fluid reservoir. If you’re unsure of the dipstick’s location, refer to the owner’s manual to locate the hydraulic tank. Most Toyota Forklift models have the hydraulic fluid reservoir located near the battery.
6). Pull out the dipstick and wipe it clean. Pull out the dipstick, wipe it clean with a clean rag, and ensure it’s dry before reinserting it.
7). Reinsert the dipstick and remove it again to check the oil level. Insert the dipstick fully and remove it again to check the oil level. The dipstick has markings on it (usually notched, dimpled, scribed, or numbered) indicating the acceptable range for the hydraulic oil level.
8). Check the oil level. The optimal hydraulic fluid level is between the ‘Medium’ to ‘High’ marks. If the oil level is above the ‘high’ mark, it may result in leakage or spills when the engine is hot and running. If the oil level is below the ‘low’ mark, it may impact the forklift’s lifting and steering abilities.
An image of a Toyota forklift parked on a level ground with its lift cylinders lowered, as the operator takes a hydraulic oil measurement reading.
Types Of Dipsticks Found In Toyota Forklifts
Toyota Forklift models use several types of dipsticks. Some common types of dipsticks include:
Flexible dipstick: This type of dipstick is made of a flexible material, such as plastic or rubber, and is commonly used in newer models. It may have numbered markings on it to indicate the oil level.
Hydraulic oil dipstick with flexible plastic design and clear readings. 50 indicates low oil, while 70 marks the optimal oil level.
Steel rod dipstick: This type of dipstick is made of a steel rod and is commonly used in older models. It may also have numbered or dotted markings on it to indicate the oil level.
A steel hydraulic oil dipstick with clear readings for precise hydraulic oil measurements.
Electronic dipstick: This type of dipstick is used in modern variants and does not require manual checking. It uses sensors to measure the oil level and displays it on the vehicle’s dashboard.
Regardless of the type of dipstick used, the most important thing to focus on is the high and low marks on the dipstick. These marks indicate the minimum and maximum levels of the fluid. And should be used as a guide to ensure that the fluid is at the appropriate level.
In the case of the Toyota Forklift, the hydraulic fluid level should be at or near the high mark to ensure the proper functioning of the hydraulic system. The hydraulic system includes components such as the hydraulic pump, cylinders, and hoses, which are responsible for lifting and moving loads. Maintaining the proper hydraulic fluid level is essential for the safe and efficient operation of the forklift.
Locating The Hydraulic Oil Dipstick On Your Toyota Forklift
The location of the hydraulic oil dipstick on a Toyota forklift varies depending on the forklift model. However, there are some common areas to look for the dipstick, which include:
Behind the operator’s seat
On the side of the forklift mast
On the hydraulic fluid reservoir
If you’re having trouble locating the hydraulic oil dipstick, you can refer to your forklift’s user manual for guidance. The manual will provide detailed instructions on where to find the dipstick and how to read it.
Tips For Finding The Dipstick In Hard-to-Reach Areas
Some forklift models have hydraulic oil dipsticks in hard-to-reach areas, making it challenging to check the hydraulic oil level. If you’re having trouble finding the dipstick, here are some tips that can help:
Use a flashlight to spot the dipstick. This can help you locate the dipstick in dimly lit areas or areas with poor visibility.
If the dipstick is still challenging to find, you can use a mirror to see the reflection. This can help you locate the dipstick even if it’s in a tight or hard-to-reach area.
If you’re still having trouble finding the dipstick, seek help from a forklift technician. A technician will have the necessary tools and expertise to locate the dipstick quickly and efficiently.
Understanding The Importance of Hydraulic Oil In A Toyota Forklift
The hydraulic oil in a forklift serves multiple functions, including lubricating moving parts, transferring power, and reducing heat buildup. Without it, the forklift wouldn’t be able to perform its primary functions, which include lifting and transporting heavy loads. Therefore, it’s essential to keep the hydraulic oil at the optimal level and quality.
Functions Of Hydraulic Oil In A Forklift
The hydraulic oil in a forklift is a critical component that performs several essential functions.
One of the primary functions of hydraulic oil is to lubricate the moving parts of the forklift. This lubrication helps to reduce friction between the parts, which can cause wear and tear over time.
Additionally, hydraulic oil helps to transfer energy from one area to another, which is crucial for the forklift’s operation.
The hydraulic oil also helps to cool the system parts, preventing overheating, and reducing the risk of breakdowns.
Finally, hydraulic oil helps to prevent rusting of metal parts, which can occur due to exposure to moisture.
It is important to note that the hydraulic oil’s quality and level play a critical role in the forklift’s performance. If the hydraulic oil level is low or the oil is contaminated, it can cause significant problems that can lead to breakdowns and increased maintenance costs.
The hydraulic oil in a forklift serves multiple functions, including lubricating moving parts, transferring power, and reducing heat buildup.
Signs Of Low Or Contaminated Hydraulic Oil
It’s essential to pay attention to the signs that indicate low or contaminated hydraulic oil in a forklift. Here are some of the most common signs:
Difficulty in lifting or lowering loads: If you notice that the forklift is struggling to lift or lower loads, it could be a sign of low or contaminated hydraulic oil. This issue can cause the forklift to work harder, leading to premature wear and tear on the parts.
Unusual noises from the hydraulic system: Unusual noises, such as grinding or whining, can be a sign of low or contaminated hydraulic oil. If left unaddressed, this issue can cause damage to the hydraulic system.
Unusual increase in temperature: If you notice that the forklift’s temperature is rising unusually, it could be a sign of low or contaminated hydraulic oil. Overheating can cause significant damage to the forklift’s engine and other parts.
Slow movement of the hydraulic cylinder: If the hydraulic cylinder is moving slowly, it could be a sign of low or contaminated hydraulic oil. This issue can cause the forklift to work harder, leading to premature wear and tear on the parts.
Irregular pressure through the hydraulic system: If you notice that the pressure through the hydraulic system is irregular, it could be a sign of low or contaminated hydraulic oil. This issue can cause the forklift to work harder, leading to premature wear and tear on the parts.
It’s important to address these signs as soon as possible to prevent further damage to the forklift. Regular maintenance and inspection of the hydraulic oil can help prevent these issues from occurring.
Recommended Hydraulic Oil Change Intervals
Toyota, a major forklift manufacturer, recommends that the hydraulic oil be replaced every 6 months or after 1,000 hours of use to ensure the hydraulic system’s proper functioning. This regular maintenance can help to prevent costly breakdowns and ensure that the forklift remains safe to operate. It is the responsibility of the forklift operator to check the hydraulic fluid level during the pre-shift inspection and ensure that it is at the appropriate level.
FAQs
How To Prepare A Forklift For An Accurate Hydraulic Oil Reading?
To prepare a forklift for an accurate reading of the hydraulic oil dipstick:
First, park the forklift on level ground.
Lower the forks and the lift cylinders to the ground and ensure they are in a level position, as elevated or tilted forks and cylinders can result in inaccurate readings.
Turn off the forklift engine and allow the hydraulic system to cool down for approximately ten minutes. This allows the hydraulic oil to settle at the correct level and temperature for an accurate reading. Avoid checking the dipstick immediately after turning off the engine, as the oil level may appear higher due to oil still circulating in the system.
What To Do If Your Hydraulic Oil Level Is Too Low?
If your hydraulic oil level is too low, you need to top it up slowly until it reaches the ‘Full’ mark. It’s important to use the correct type of hydraulic oil recommended by the forklift manufacturer to avoid damaging the hydraulic system. Before adding the hydraulic oil, ensure that the forklift is on level ground and the engine is turned off. Once the hydraulic oil level is optimal, start the forklift and let it operate for a few minutes to ensure it’s working correctly.
It’s also essential to check for any leaks that may have caused the hydraulic oil level to drop. Leaks can occur due to damaged hoses, seals, or fittings. If you notice any leaks, it’s crucial to have them repaired promptly to avoid further damage to the hydraulic system.
What to Do If Your Hydraulic Oil Level Is Too High?
If your hydraulic oil level is too high, you need to drain out some of the oil until it reaches the optimal level. Overfilling the hydraulic oil system can cause leaks and damage the hydraulic system’s components. It’s important to use a clean container to collect the excess hydraulic oil and dispose of it properly.
Overfilling can also cause foaming, which can lead to air entering the hydraulic system. Air in the hydraulic system can cause cavitation, which can damage the hydraulic pump and other components. If you notice any foaming, it’s essential to drain out the excess hydraulic oil and refill it to the optimal level.